Authoring the content of a Likert item
Authoring the content of an Likert item consists of entering the item's stem (exam question or stimulus). The default answer choices for the item are pre-populated.
|
|
Note: A Likert item can be associated to a passage. The passage contains stimulus content that will assist the candidate in answering the question. For more information on associating a passage to an item click here.
|
While authoring, you may format and spell check item text, and add tables, images, audio/video clips, and symbols.
To author the content of a Likert item:
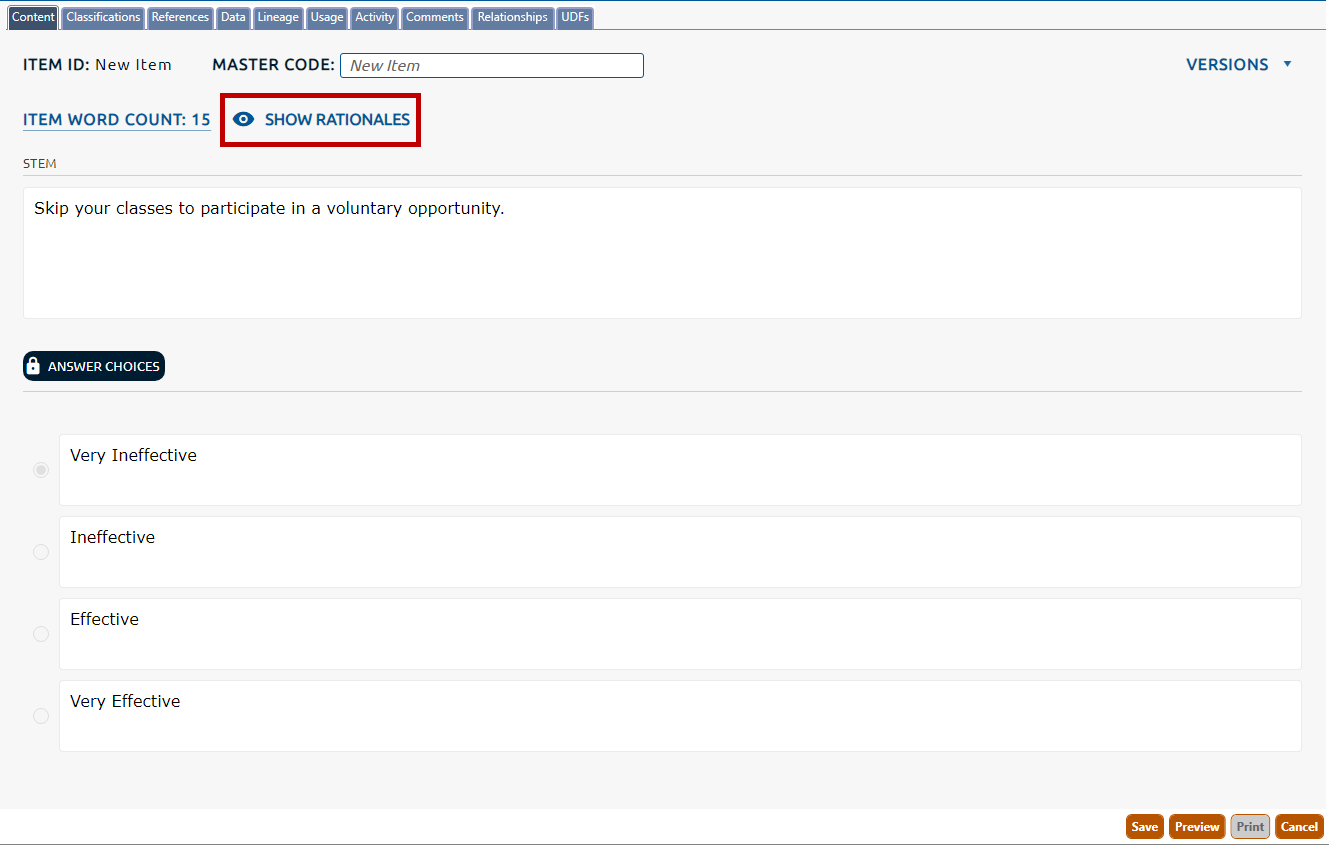
1. Navigate to the Content tab (highlighted below).
2. In the Stem field (shown below), enter the question using rich text, images and audio/video clips (called exhibits), symbols, and tables.
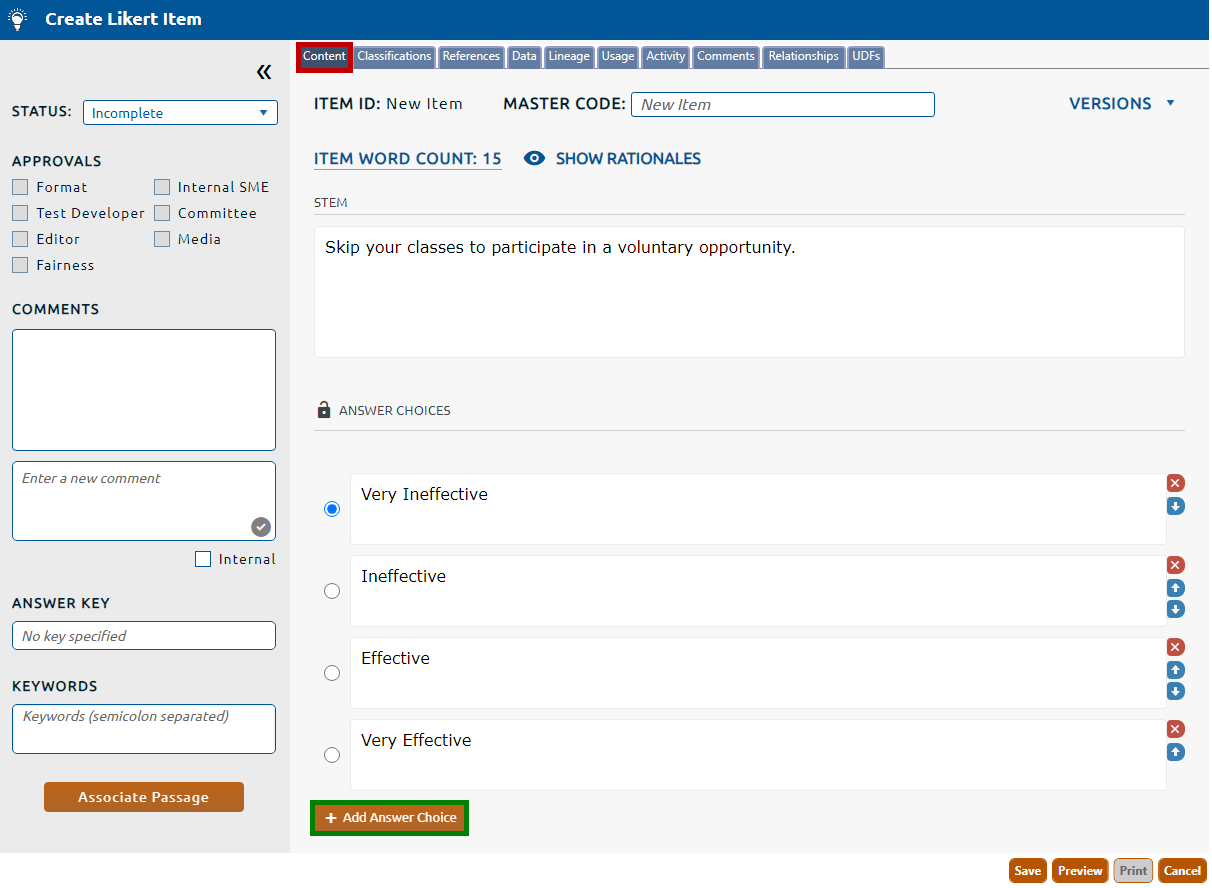
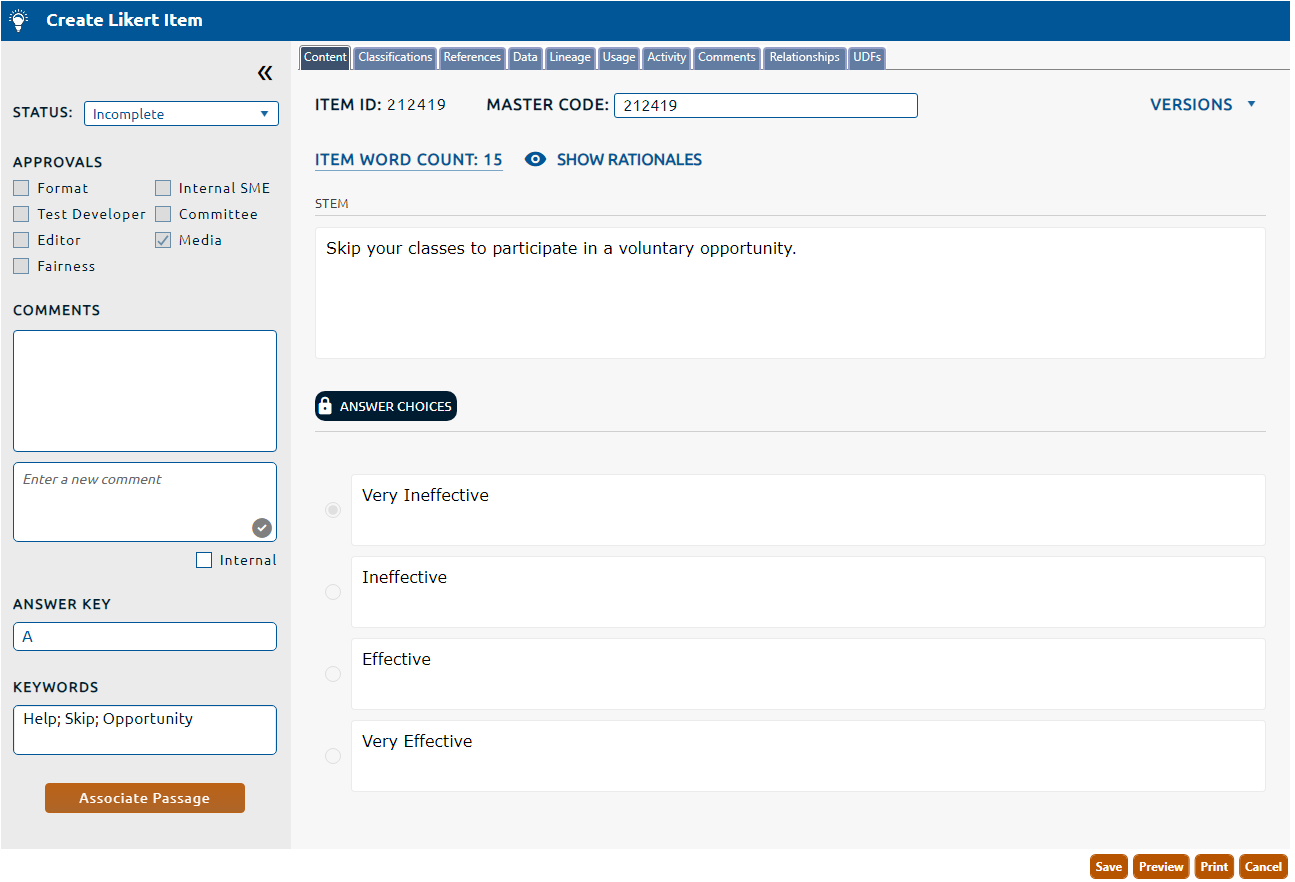
In the example below, the user has entered a question regarding a volunteer opportunity:
3. The item will default to displaying four pre-populated answer choices with the following values: Very Ineffective, Ineffective, Effective and Very Effective. If desired, these values can be edited. The number of answer choices can also be changed. An exam question may have 2 through 5 answer choices. The item defaults to displaying 4 answer choices, by changing the value the screen it will refresh with the appropriate number of radio buttons and blank fields.
4. Click the radio button for the Likert item's correct answer, called the key (the other answer choices are called distractors).
In the example below, the user has entered four answer choices, then chosen "Very Ineffective" as the key.
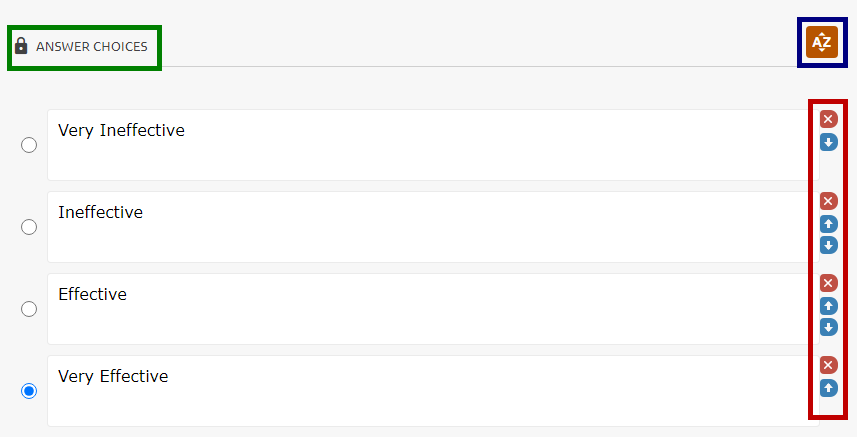
5. You have the option of moving each answer choice up or down in the order you wish them to appear on the test. To do this, click the appropriate up or down arrow on the right of the answer choice you wish to move (highlighted in red, above).
6. To delete an answer choice click the red X to the right of the answer choice (highlighted in red, above). Accepting the deletion confirmation will remove the answer choice from the list.
7. To alphabetize the answer choices click the AZ icon (highlighted in blue, above). Clicking this icon will position the distractors in alphabetical order based on their content.
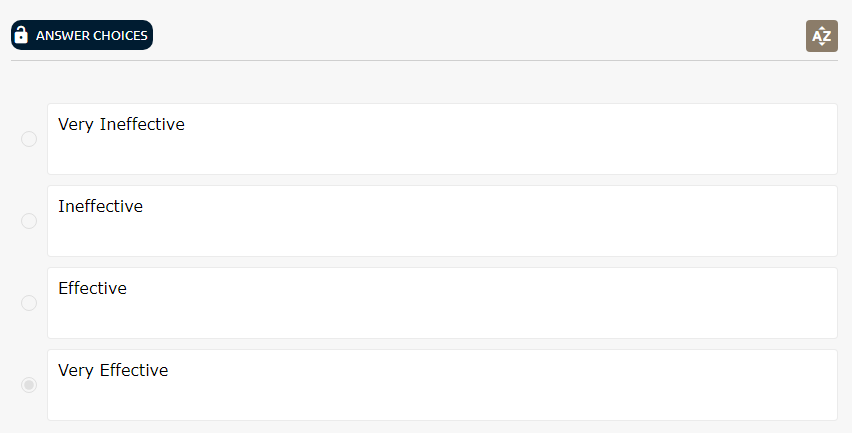
8. To lock the answer choice content and its position within the question, click the lock icon (highlighted in green, above). If the section allows for key balancing then setting this lock will prevent the system from balancing the key for this item. Click for setting key balancing on\off for a section.
The answer choice lock can be clicked again to unlock the answer choices and allow for editing.
8. The Master Code field is used to assign a user specified alphanumeric identifier to the item. This identifier can be used in place of the item id in many of the systems functions that require item identifiers. If not provided the system will populate this field with the Item Id by default on save.
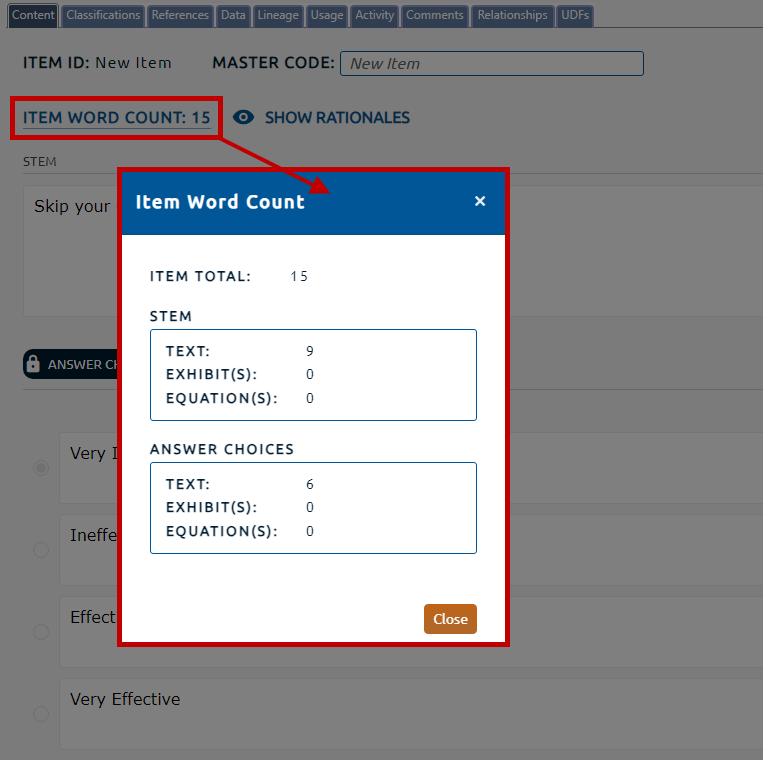
9. Content tab provides an Item Word Count (highlighted in red, below) for the item content. Selecting the Item Word Count hyperlink will open the Item Word Count dialog. This dialog will provide a statistical breakdown of the item's word count.
The Item Total consists of the following:
-
Text: The number of words used.
-
Exhibit(s): The summation of all exhibits multiplied by their section default or custom word valuation.
-
Equation(s): The summation of all equations within the Content multiplied by their section default or custom word valuation.
The dialog contains a breakdown of the usage in the item's Stem and Answer Choices.
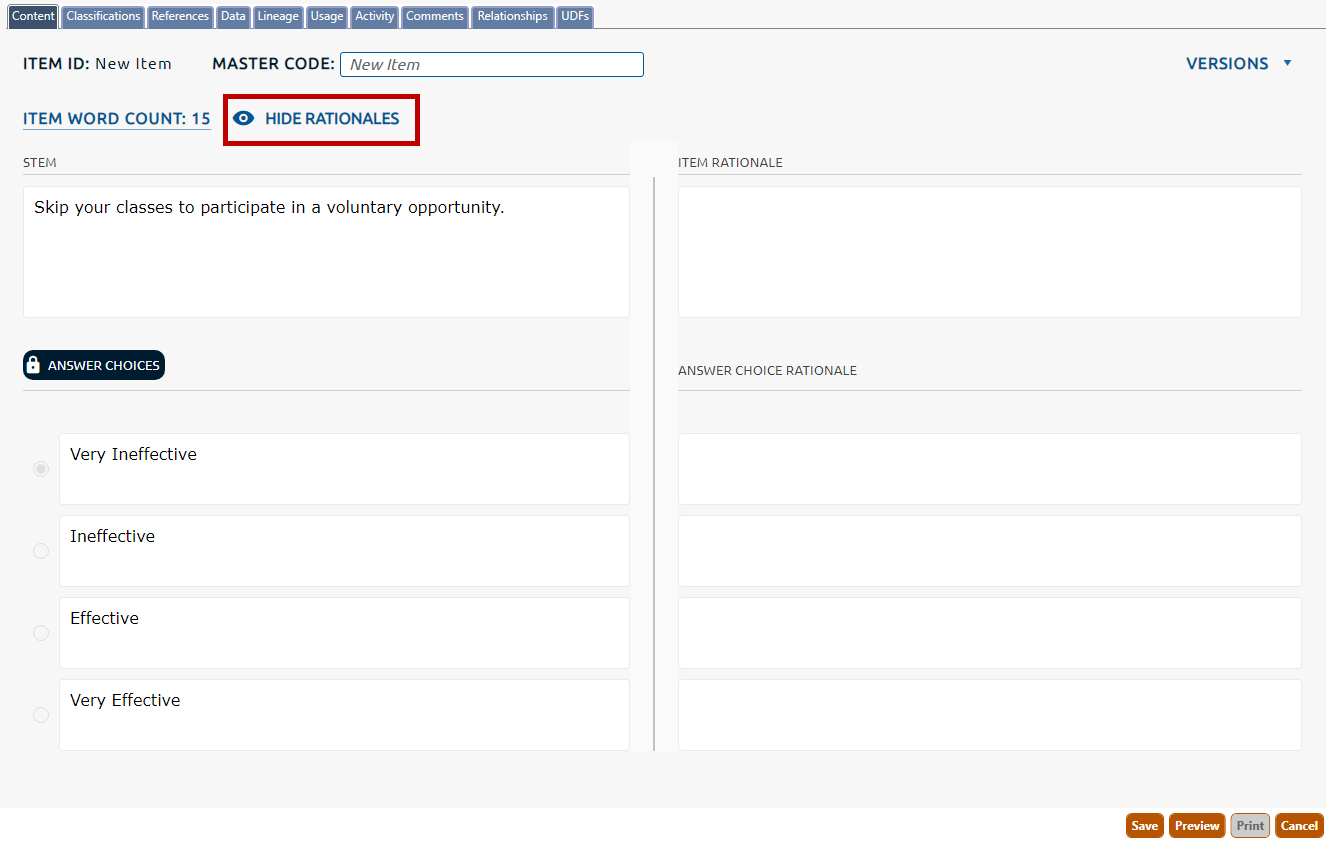
10. To enter a rationale for the items stem and answer choices click the Show Rationales icon (highlighted in red, below).
The screen becomes evenly divided. The content is displayed in the left hand pane and the rationales in the right hand pane. The panes are separated by a sliding divider that allows for the resizing of the division by drag and drop.
Enter the rationale for the item in the Item Rationale field, and then enter rationales for each of the item's answer choices in the Answer Choice Rationale fields. When entering item rationales, you can format and spell check text, plus add tables, images, and symbols. In the example below, the user has entered all rationales:
Click the Hide Rationales icon (highlighted in red, below) to hide the rationales and display the item content only.
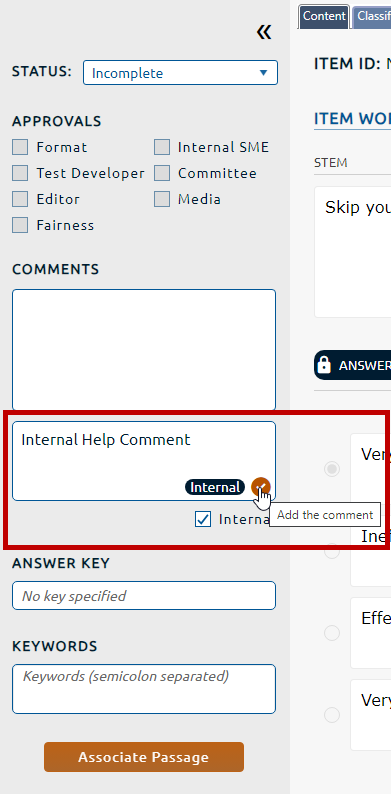
11. Comments for the item can be entered by into the Enter a new comment text area (highlighted in red, below).
Checking the Internal checkbox will identify the comment as one that is only viewable within Pro!. External project members will not have access to view this comment. Leaving the box unchecked allows the comment to be seen by all.
Clicking the Add the comment check mark icon will persist the comment.
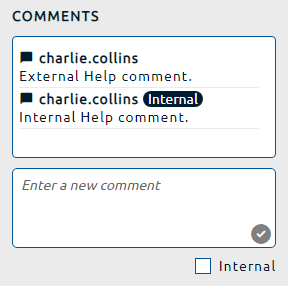
Internal comments will be added with an identifier as shown above.
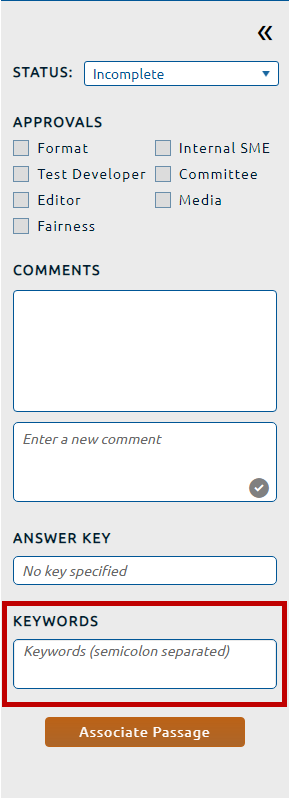
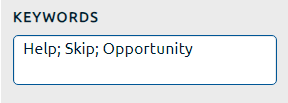
12. In the Keywords field (highlighted in red, below), enter keywords and phrases for the item, each separated by a semicolon (;).
These keywords will be searchable when performing an item search. In the example below, the user has entered three keywords:
13. Click the Save button and the item has been saved, and assigned a new Item ID by the system (212419).