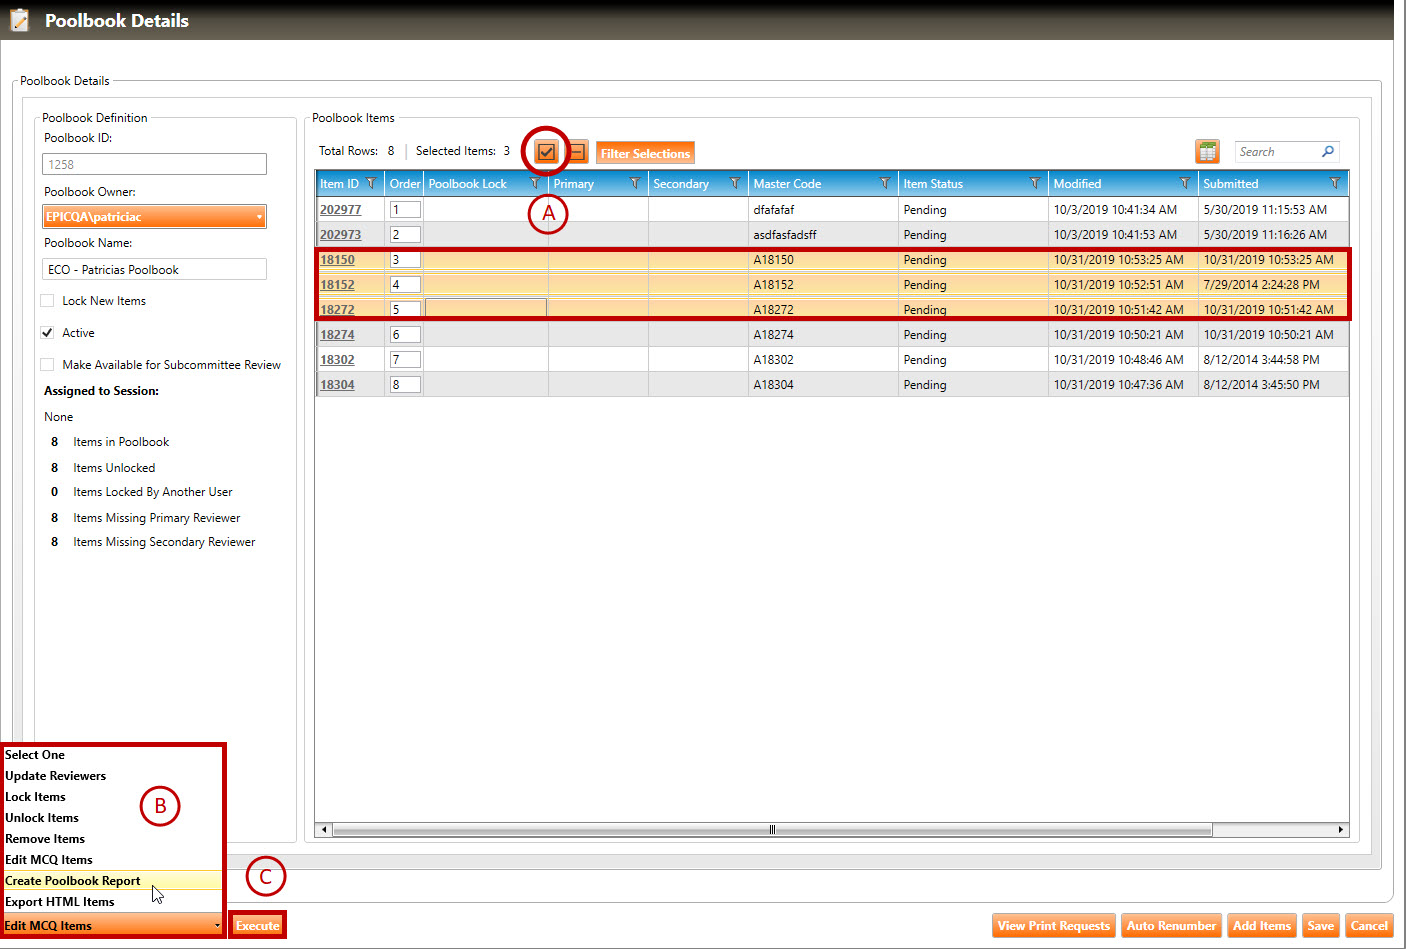
A. Select the poolbook items that you wish to include in the poolbook report. To select all poolbook items, click the checkmark button (circled, above). In the example above, the user has selected three poolbook items. If the user does not select any items, the system will select all items in the poolbook view.
B. Select Create Poolbook Report from the Select One dropdown list.
C. Click the Execute button. The Create Poolbook Report window will appear:
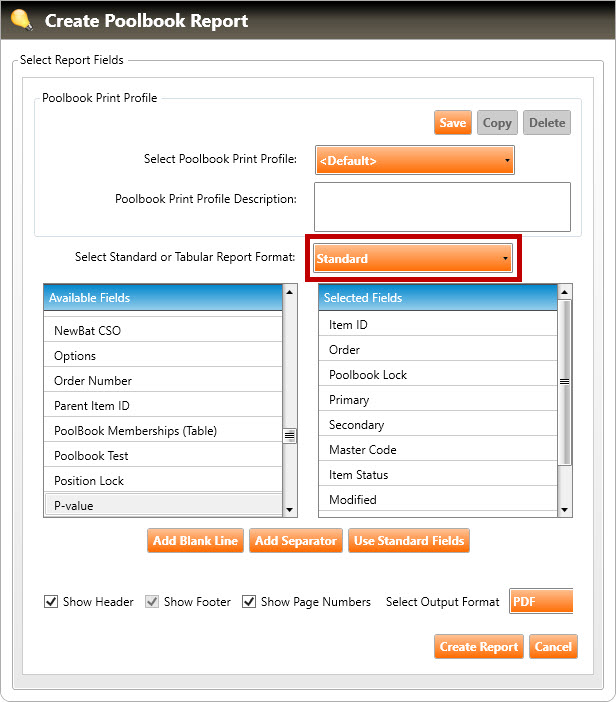
3. Select the report format from the Select Standard or Tabular Report Format dropdown list (highlighted above).
4. Follow Steps A and B for the report format you selected in Step 5, above:
Standard report format
A. Set up the structure/format of the poolbook report:
The Selected Fields list shows which item fields will appear in the poolbook report. This list reflects the selection and order of the columns in the Poolbook Items list pane of the Poolbook Detail screen.
To use a predetermined set of fields, click the Use Standard Fields button.
To add a field to the report, drag the field from the Available Fields list and drop it in the Selected Fields list.
To add a blank separator to the Selected Fields list, click the Add Blank Line button.
To add a horizontal line to the Selected Fields list, click the Add Separator button.
To remove a field, blank separator, or horizontal line from the Selected Fields list, drag it from the Selected Fields list and drop it in the Available Fields list.
To reorder the Selected Fields (including blank and horizontal lines), simply drag and drop them in the order you wish for them to appear in the report.
Choose a format (Word or PDF) for the poolbook report.
Select or deselect the Show Header and Show Page Numbers checkboxes.
B. Click the Create Report button.
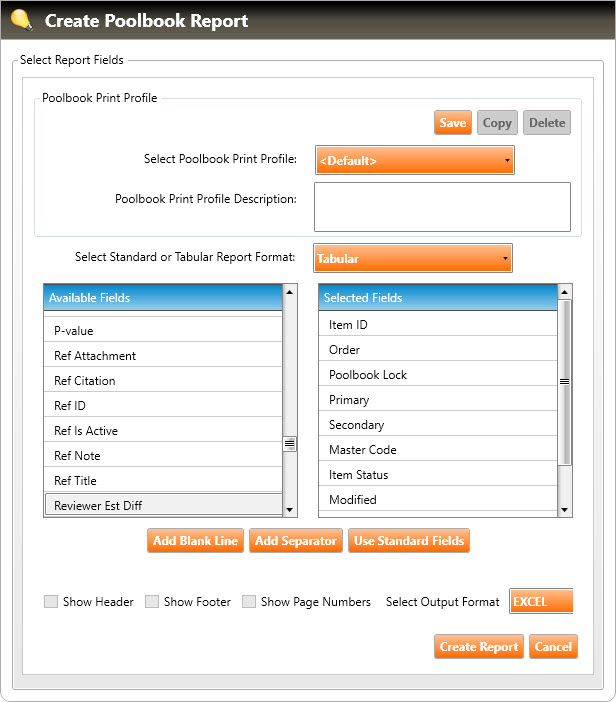
Tabular report format
A. Set up the structure/format of the poolbook report:
The Selected Fields list shows which item fields will appear in the poolbook report. This list reflects the selection and order of the columns in the Poolbook Items list pane of the Poolbook Detail screen.
To use a predetermined set of fields, click the Use Standard Fields button.
To add a field to the report, drag the field from the Available Fields list and drop it in the Selected Fields list.
To add a blank separator to the Selected Fields list, click the Add Blank Line button.
To add a horizontal line to the Selected Fields list, click the Add Separator button.
To remove a field, blank separator, or horizontal line from the Selected Fields list, drag it from the Selected Fields list and drop it in the Available Fields list.
To reorder the Selected Fields (including blank and horizontal lines), simply drag and drop them in the order you wish for them to appear in the report.
Choose a format (Word, PDF, Excel, or CSV) for the poolbook report.
Depending on which format you choose, you can select or deselect the Show Header and Show Page Numbers checkboxes.
B. Click the Create Report button.
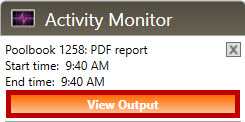
5. Click the View Output button in the Activity Monitor:
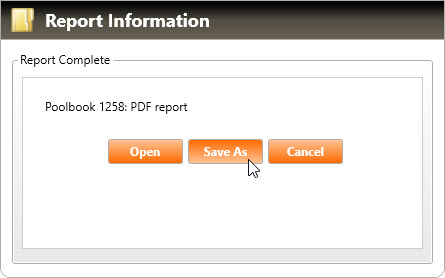
6. The Report Information window will appear (shown below). If you want to immediately open the file to your screen, click the Open button. The poolbook report will open as the chosen file type using a view application associated with the chosen report output type. You can then save the file to your local machine from the application, or by closing the viewer and again clicking the View Output button, clicking the Save As button, and following the prompts to save the file.