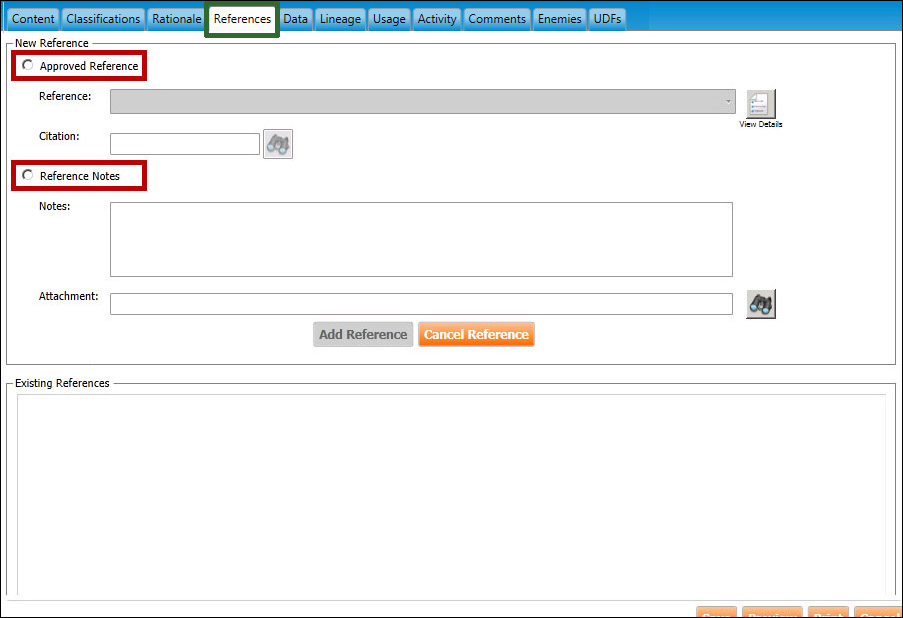
1. Navigate to the References tab (highlighted in green, below):
2. Click either the Approved Reference or Reference Notes radio button (highlighted in red, above), and follow the appropriate instructions:
Choose an approved reference
To choose an approved reference:
After you click the Approved Reference radio button, the Reference field will become active.
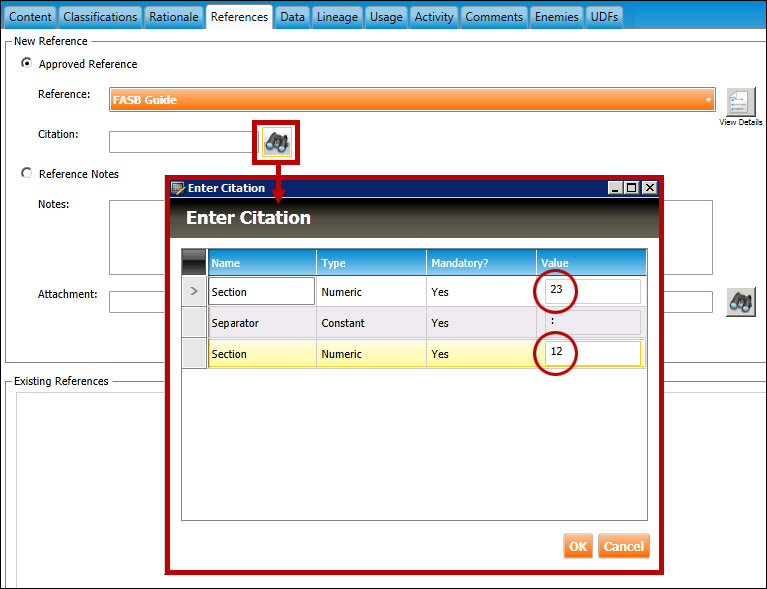
Select an existing reference from the Reference dropdown menu.
Note:Click here for information on creating and managing references in the reference library.
After selecting the reference, you can click the View Details button to view the full reference:
To add custom citation(s) to the reference, click the binoculars button next to the Citation field, and enter the citation(s) in the Value field(s) of the Enter Citation dialog box (shown below), then click the OK button. In the example below, the user has entered a required section number citation with the value 23:12.
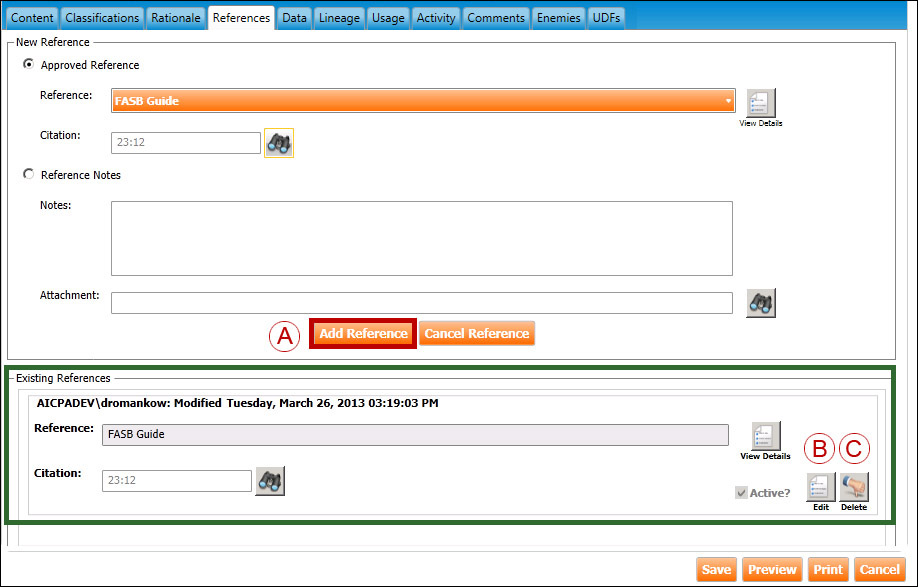
To assign the approved reference and then edit/delete it, refer to the figure below and follow Steps A through C:
A. Click the Add Reference button to assign the reference to the item. The reference will appear in the Existing References section of the screen (highlighted in green, above).
B. To switch the added reference to a different existing reference, click the Edit button, select a different reference from the Reference dropdown list, then click the Update Reference button that appears.
C. To delete the added reference, click the Delete button, then click any confirmation buttons that appear.
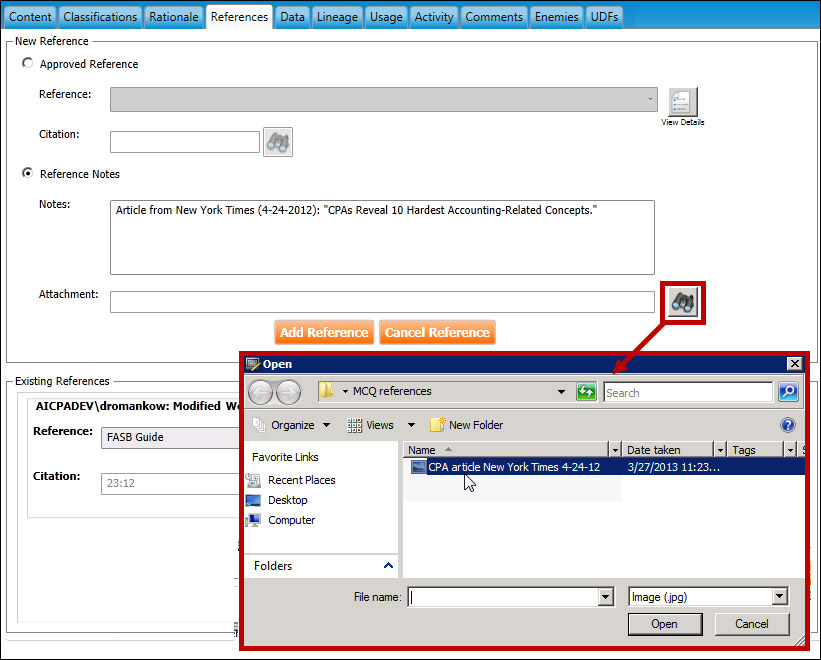
After you click the Reference Notes radio button, the Notes and Attachment fields will become active.
Enter notes in the Notes field.
To add attachments to your note, click the binoculars button then browse the local or network drive to find the desired file (.jpg, .gif, .png, .bmp, and .pdf files only):
Click the Open button to attach the file.
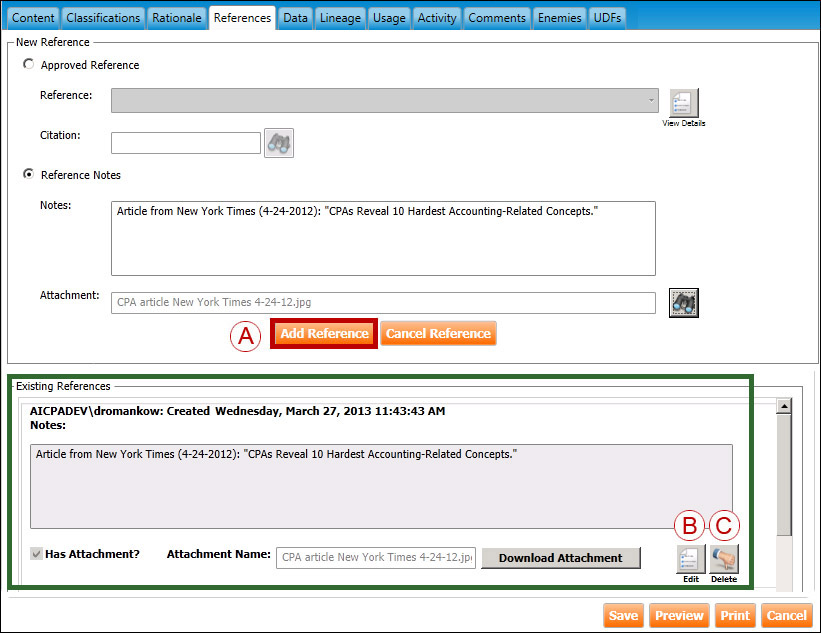
To assign the reference note and then edit/delete it, refer to the figure below and follow Steps A through C:
A. Click the Add Reference button to assign the reference to the item. The reference will appear in the Existing References section of the screen (highlighted in green, above).
B. To switch the added reference to a different reference, click the Edit button, enter a different reference note, then click the Update Reference button that appears.
C. To delete the added reference, click the Delete button, then click any confirmation buttons that appear.
Click the Save button to save all changes
3. You may assign additional approved references or reference notes to the item by repeating Steps 1 and 2, above.
Watch following video clip for a demonstration on how to assign a reference to an item: