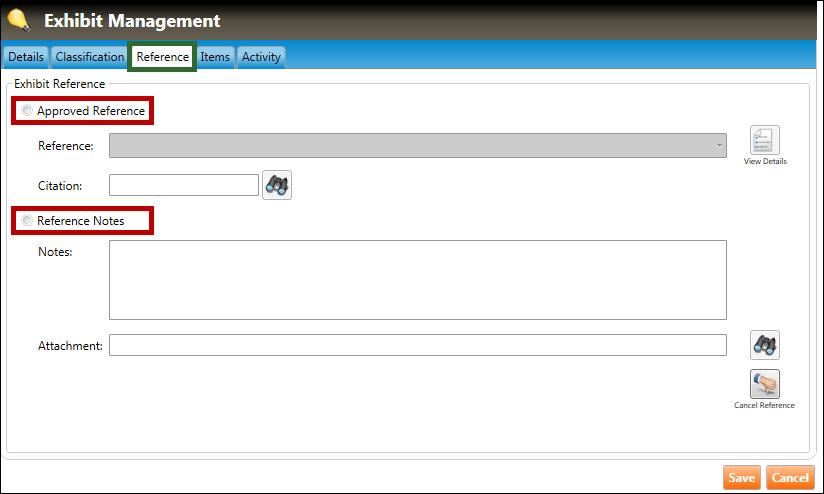
1. Navigate to the Reference tab (highlighted in green, below):
2. Click either the Approved Reference or Reference Notes radio button (highlighted in red, above), and follow the appropriate instructions:
Choose an approved reference
To choose an approved reference:
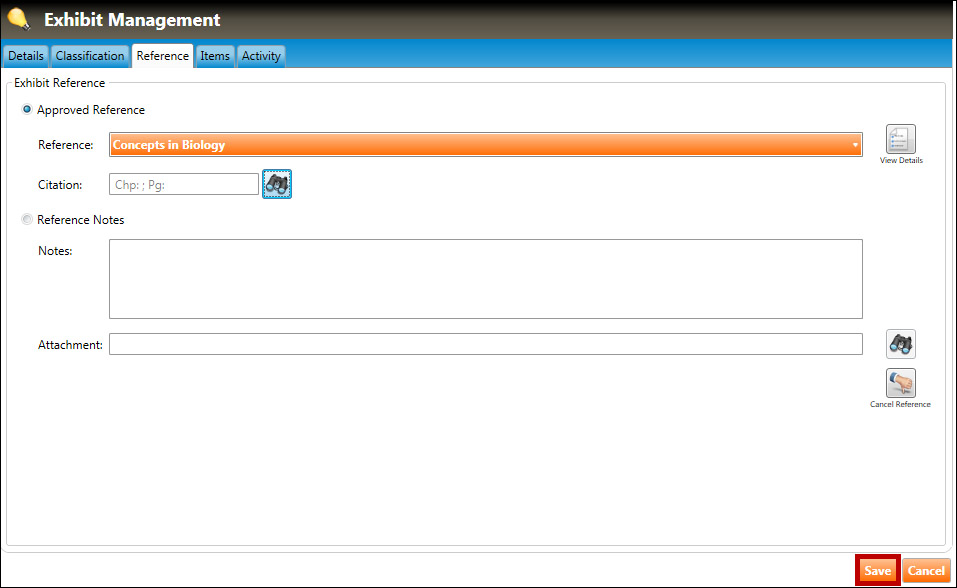
After you click the Approved Reference radio button, the Reference field will become active.
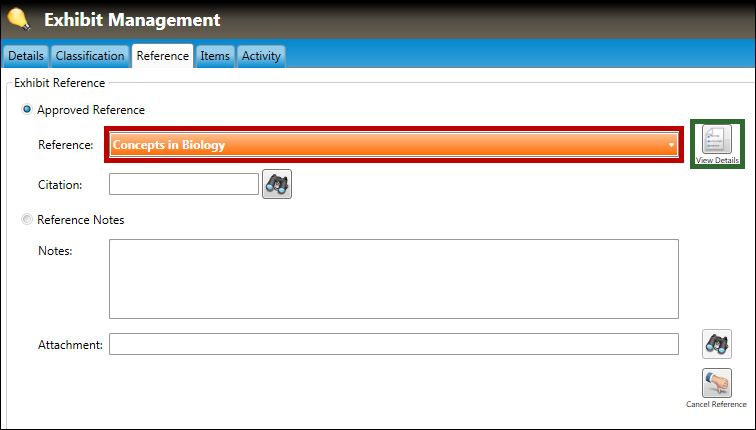
Select an existing reference from the Reference dropdown menu.
Note:Click here for information on creating and managing references in the reference library.
C. After selecting the Reference (highlighted in red, below), you can click the View Details button (highlighted in green, below) to view the full reference.
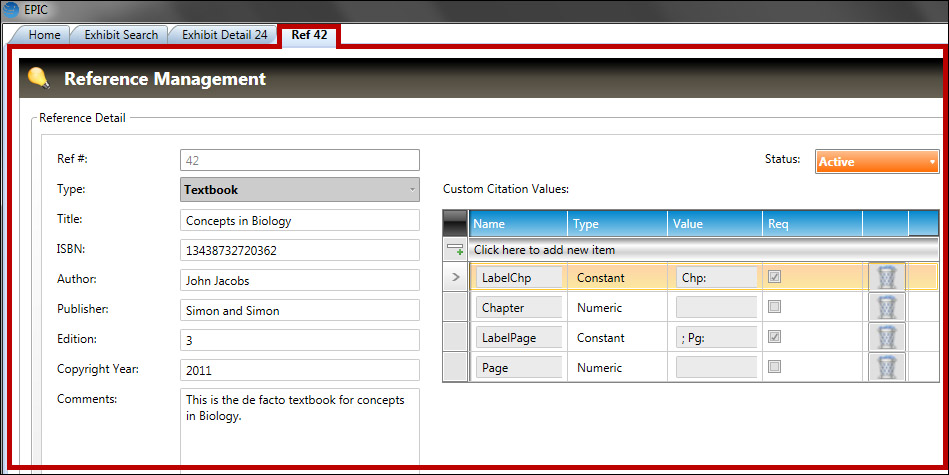
When you click the View Details button, the reference will open in a separate tab:
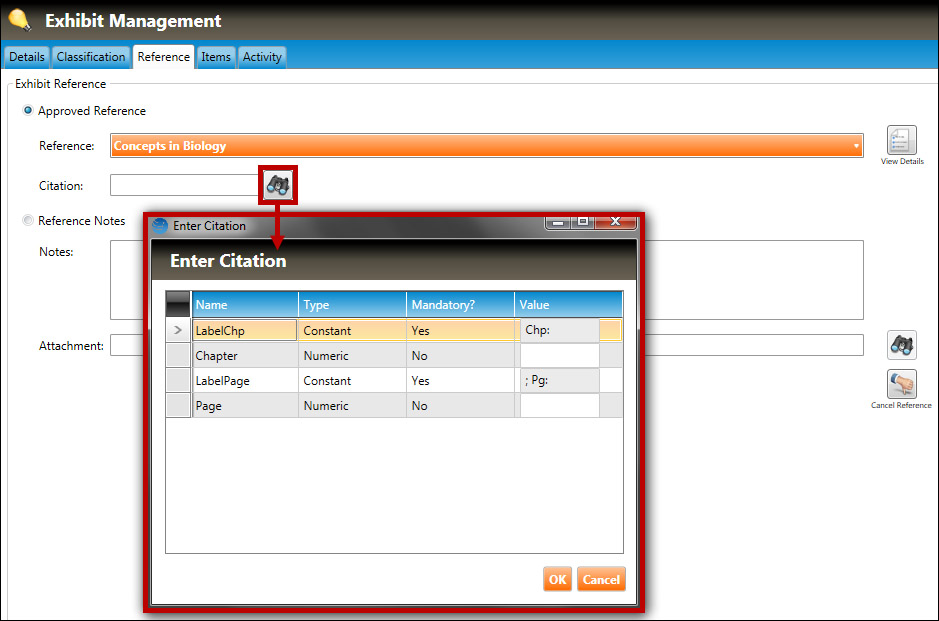
D. To add custom citation(s) to the reference, click the binoculars button next to the Citation field, and enter the citation(s) in the Value field(s) of the Enter Citation dialog box (shown below), then click the OK button.
E. To assign the approved reference, click the Save button (highlighted in red, below):
Enter a reference note
To enter a reference note:
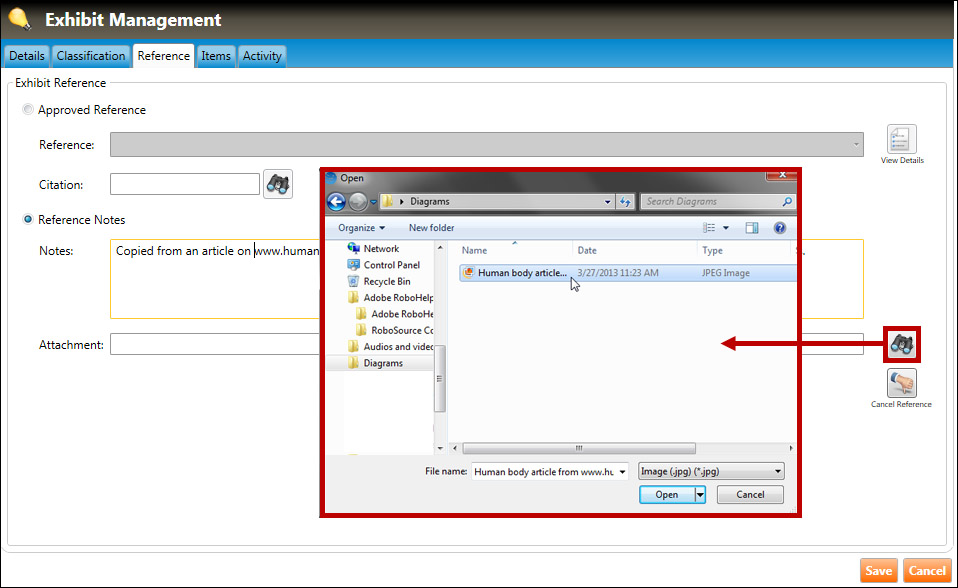
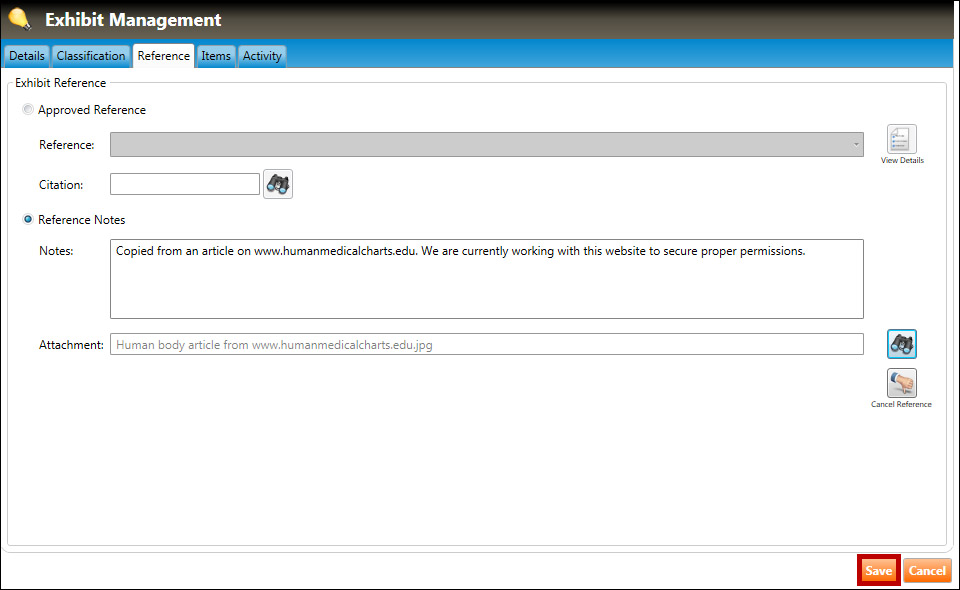
After you click the Reference Notes radio button, the Notes and Attachment fields will become active.
Enter notes in the Notes field.
To add attachments to your note, click the binoculars button then browse the local or network drive to find the desired file (.jpg, .gif, .png, .bmp, and .pdf files only):
Click the Open button to attach the file.
To assign the reference note, click the Save button: