Identifying relationships for an item
Enemy items should not be given to the same candidate in the same testing session. There are several reasons this would be undesirable. For example, two items ask almost the same question, which places too much weight on one competency. It could also be that the wording of one item implies the answer to the other item, which gives the candidate an unfair advantage over candidates that were not presented with those two items.
Partner items will be delivered to the same candidate in the same testing session. The purpose of the partner item is as a follow up question, if the item is answered incorrectly. The partner item is intended to retest the same competency.
To identify enemies for an item:
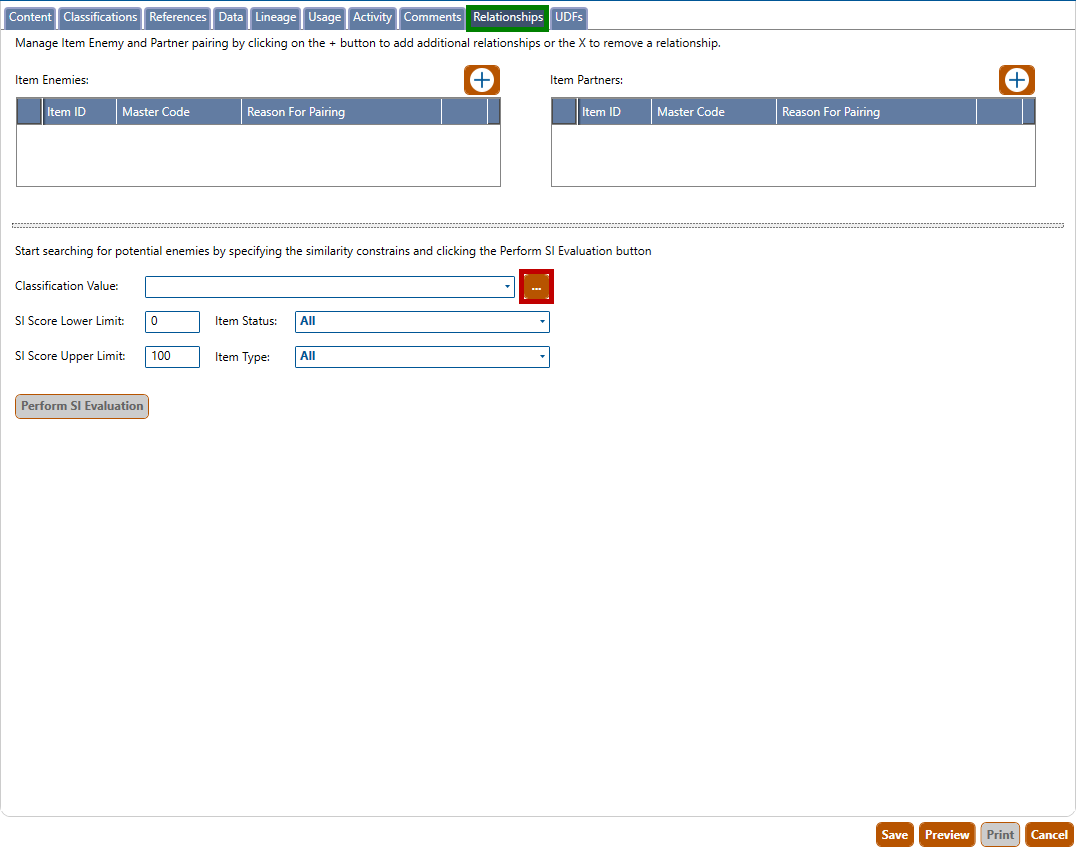
1. Navigate to the Relationships tab (highlighted in green, below):
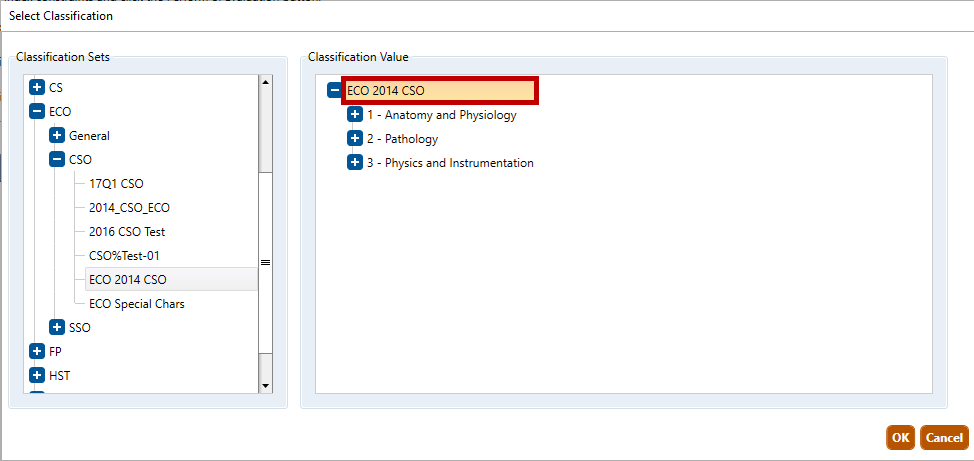
2. To enter a Classification Value for potential enemies, click the browse button (highlighted in red, above). When the Select Classification dialog box opens (shown below), drill down and select the desired classification, then click the OK button. In the example below (highlighted in red), the user has clicked ECO 2014 CSO.
3. Enter the upper and lower similarity index (SI) values for potential enemies (highlighted in green, below), ranging from 0 to 100.
4. You may also limit your search for potential enemies by selecting an Item Status and Item Type for them (highlighted in red, above).
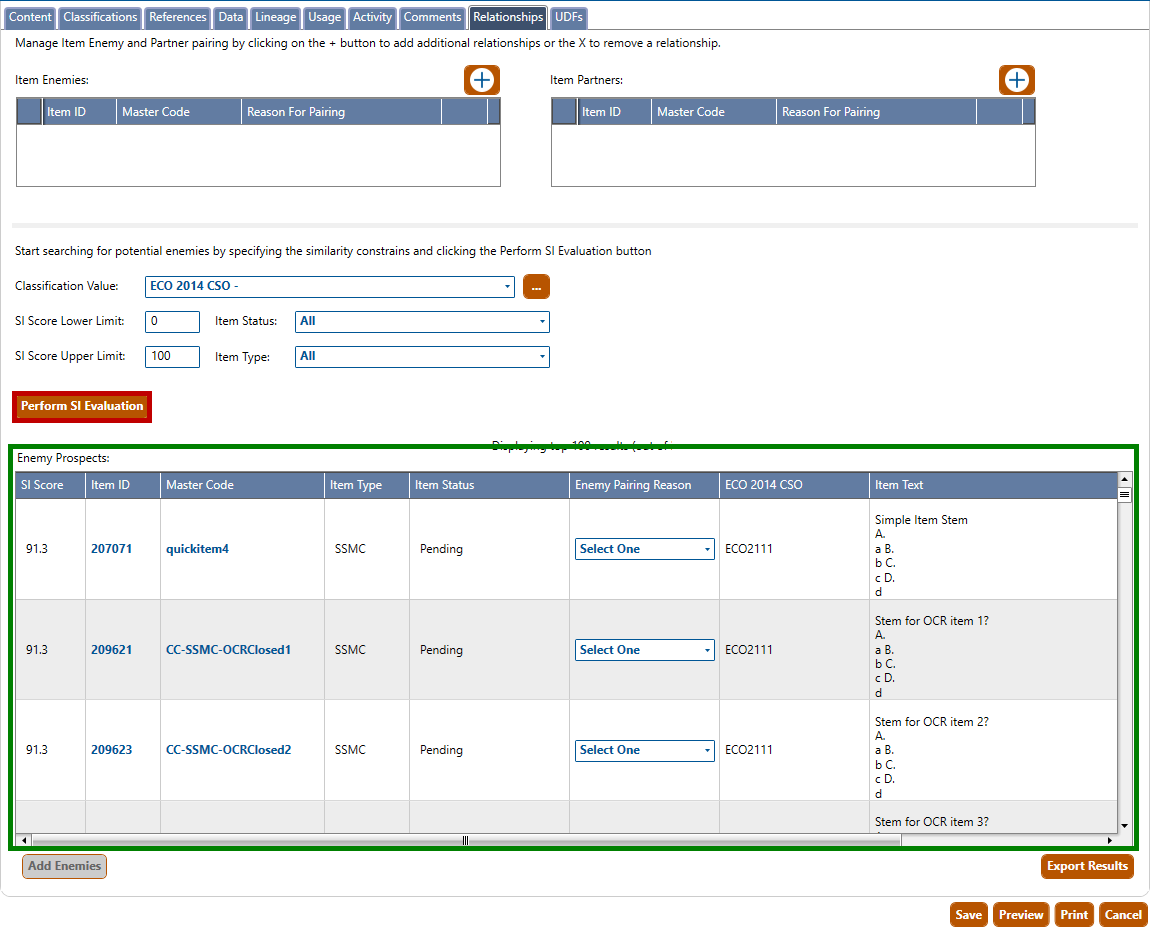
5. Click the Perform SI Evaluation button (highlighted in red, below) to perform the enemy evaluation. Pro! parses out all of the noise words in items and reduces each remaining word to its “stem." Pro! then searches the item inventory for all items that match the parameters and specified classification and calculates their similarity to the base item. Potential enemies will appear in the Enemy Prospects field (highlighted in green, below):
6. To open a potential enemy, click the desired Item ID to open the item in its own tab.
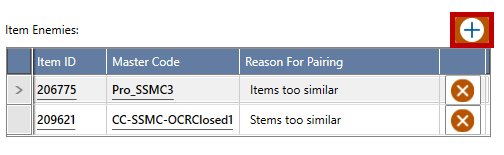
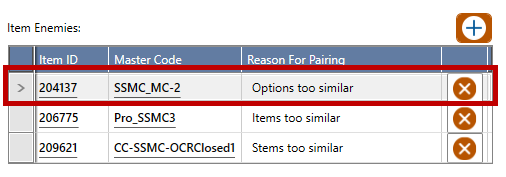
7. If you wish to identify one or more enemy prospects as true enemies, select an Enemy Pairing Reason for each item from the drop-down lists, then click the Add Enemies button. The enemy item(s) will appear in the Item Enemies field:
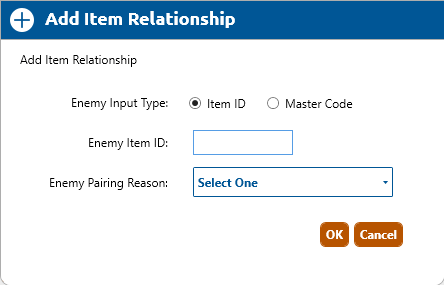
8. You may also wish to add enemy items manually. To do this, click the add enemy icon  (highlighted in red, above) to open the Add Item Relationship dialog box:
9. Select the button for the appropriate Enemy Input Type. In the Enemy Item ID field, enter an Item ID or Master Code for the item that you wish to identify as an enemy.
10. Select an Enemy Pairing Reason.
11. Click the OK button to add the item to the enemy item list:
12. To delete an enemy from the list, click the delete icon  next to the desired enemy.
13. Click the Save button to save all changes.
To identify partners for an item:
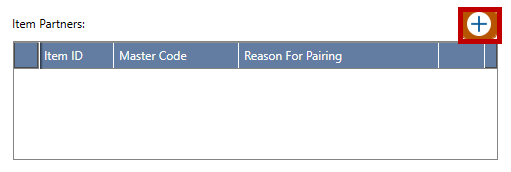
1. From the Relationships tab, click the add partner icon (highlighted in red, below) to open the Add Item Relationship dialog box:
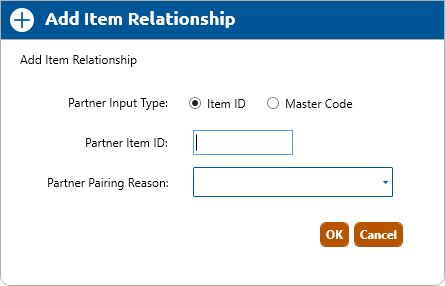
2. Select the button for the appropriate Partner Input Type. In the Partner Item ID field, enter an Item ID or Master Code for the item that you wish to identify as a partner.
3. Select an Partner Pairing Reason.
4. Click the OK button to add the item to the partner item list:
5. To delete a partner from the list, click the delete icon next to the desired partner.
6. Click the Save button to save all changes.