Printing exam form groups
Pro! provides the ability to print exam form groups in two distinct ways:
-
The standard Print functionality will allow for the selection of one or more exam form groups (EFGs). This option will produce one Word document for each exam form within each selected exam form group. Each file will contain all sections associated with the exam form.
2. The Print Sections functionality allows the user to select the specific sections to be printed for one exam form group. The selected sections can then be output to individual Word files for each section of the exam form or all selected sections can be output to one Word file for each exam form.
|
|
Note: Click here for full instructions on finding a specific exam form group.
|
To print multiple exam form groups:
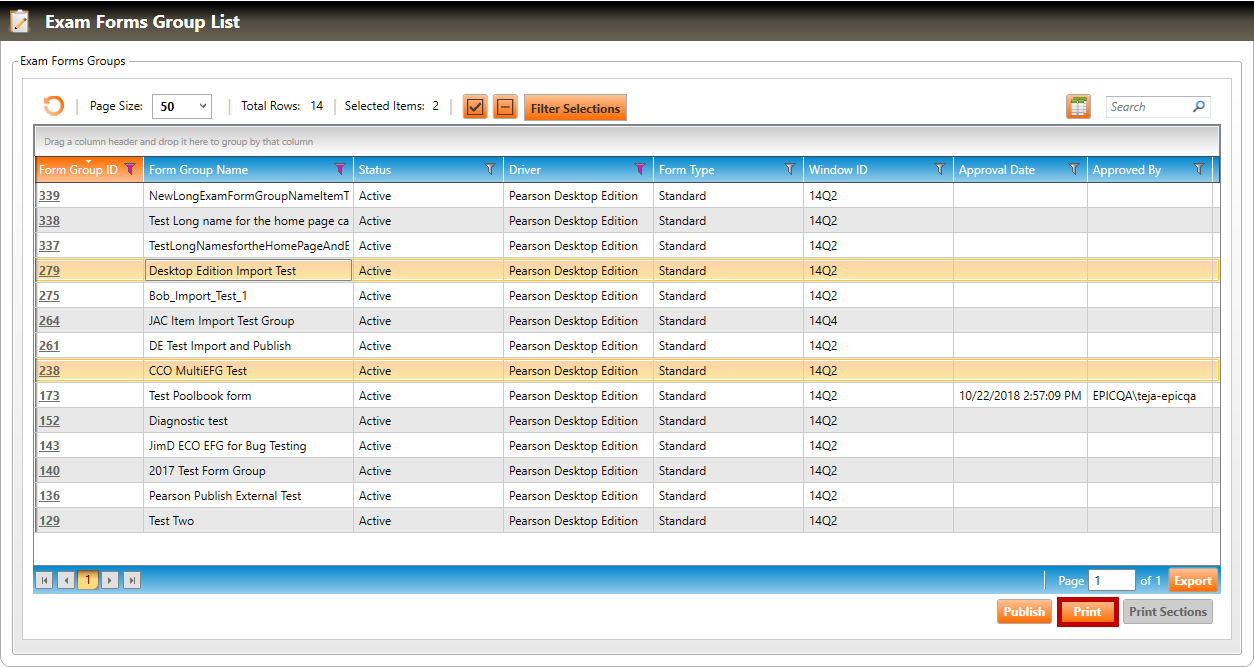
1) Select one or more exam form groups from the Exam Form Group List page and click the Print button (highlighted in red, below).
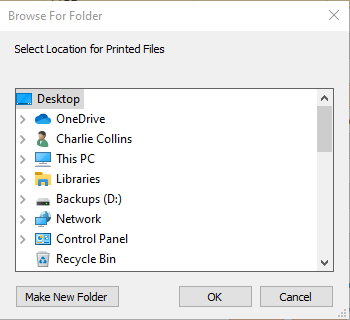
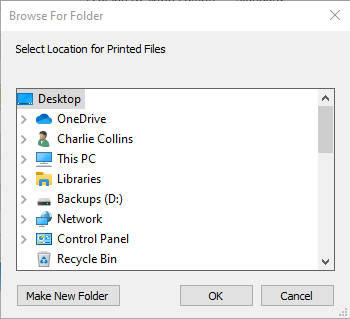
2) The Browse For Folder dialog is displayed. Select a location to write the print output, then click the OK button.
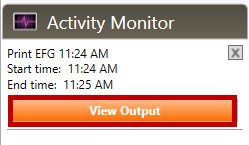
3) The print request progress will display in the Activity Monitor. When complete, click the View Output button (highlighted in red, below).
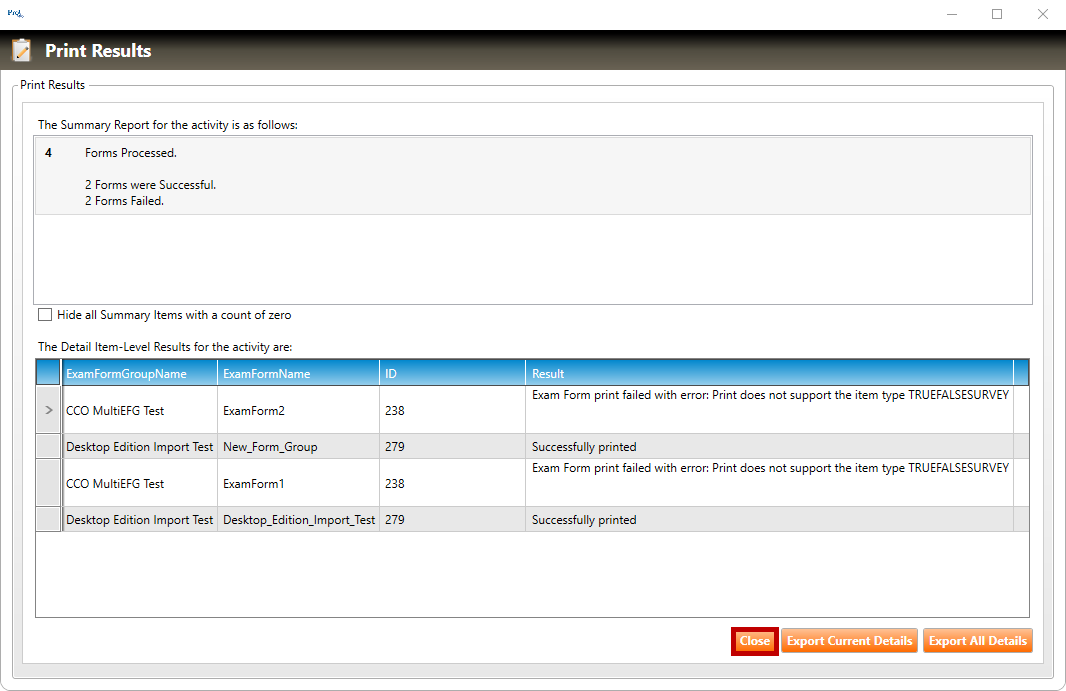
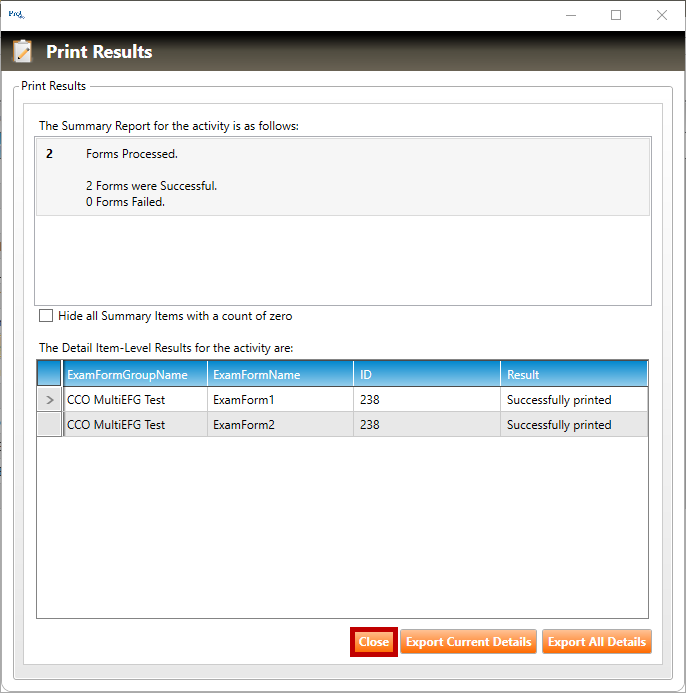
4) The Print Results dialog is displayed. The dialog will show which forms were printed successfully, as well as any that may have errored. Click Close (highlighted in red, below) to dismiss the dialog.
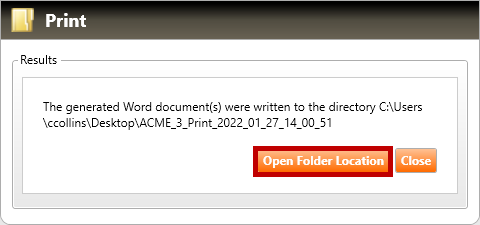
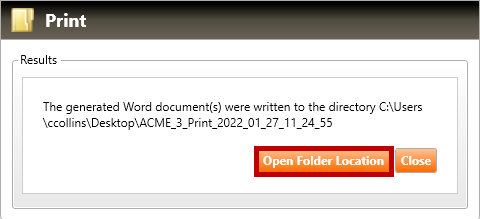
5) The Print dialog will display the location of the successfully printed Word document(s). Click Open Folder Location (highlighted in red, below) to open the folder containing the print output.
To print the sections of an exam form group:
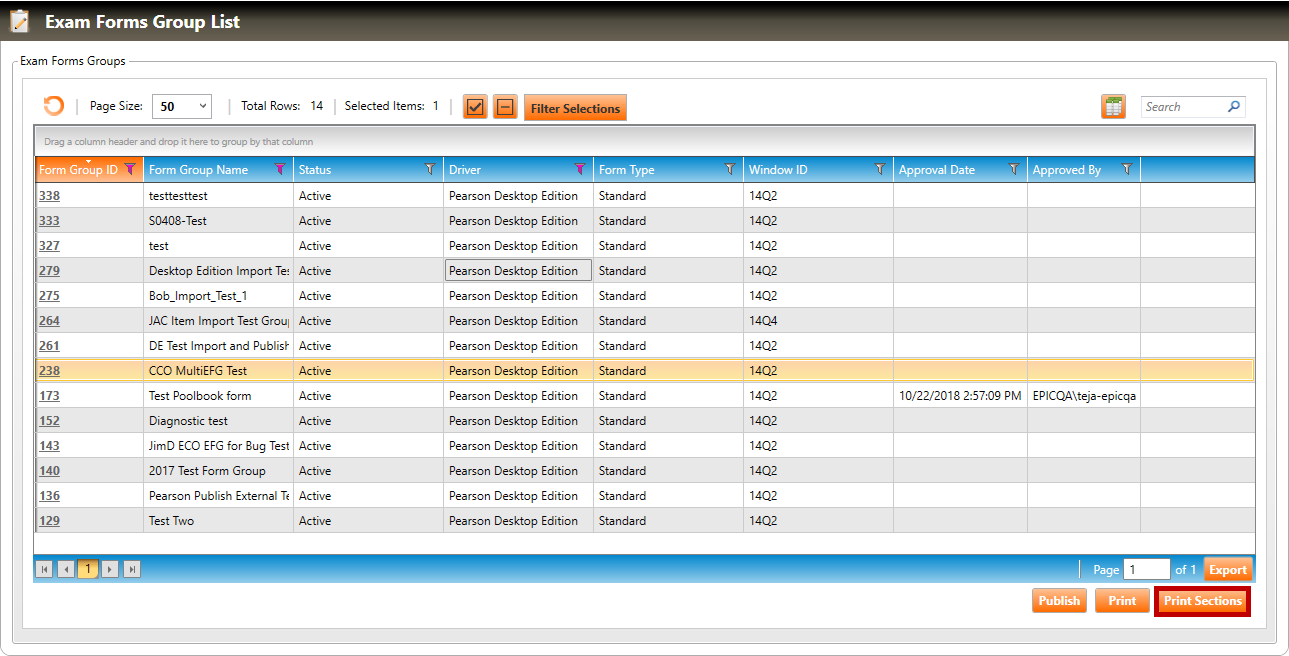
1) Navigate to the Exam Form Group List page and click the row of the exam form group to be printed. Click the Print Sections button (highlighted in red, below) that was enabled with the exam form group selection.
2) The Print Sections dialog box will display each of the layout sections of the selected exam form group.
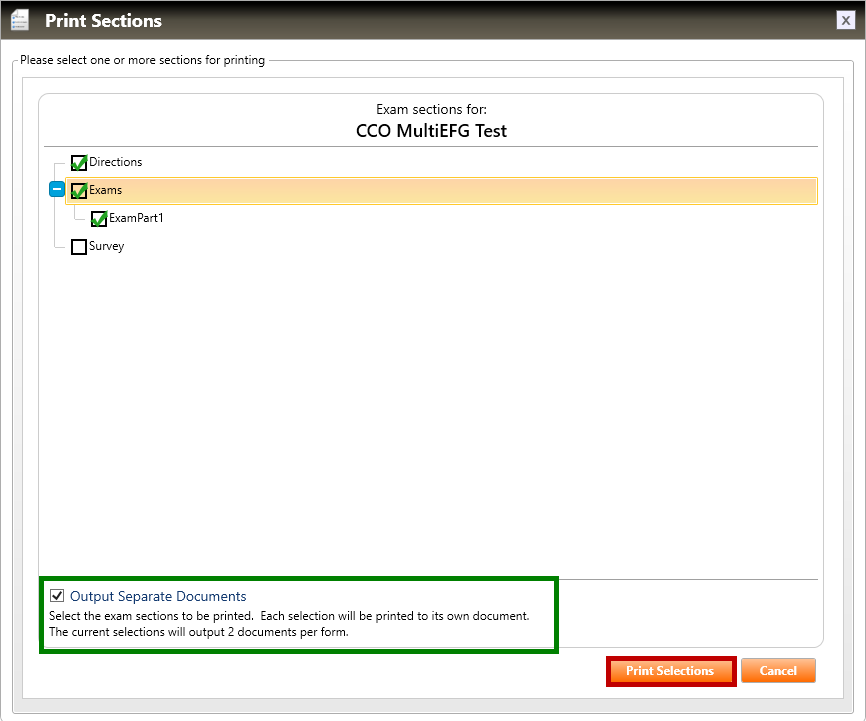
3) Selecting the sections to be printed, will enable the Print Selections button (highlighted in red, below). By default the Output Separate Documents checkbox is selected (highlighted in green, below). Leaving it selected will place each selected section within its own Word document for each form within the form group. In the example below, the CCO MulitEFG Test form group contains two forms and two sections are selected. This will result in four documents being produced.
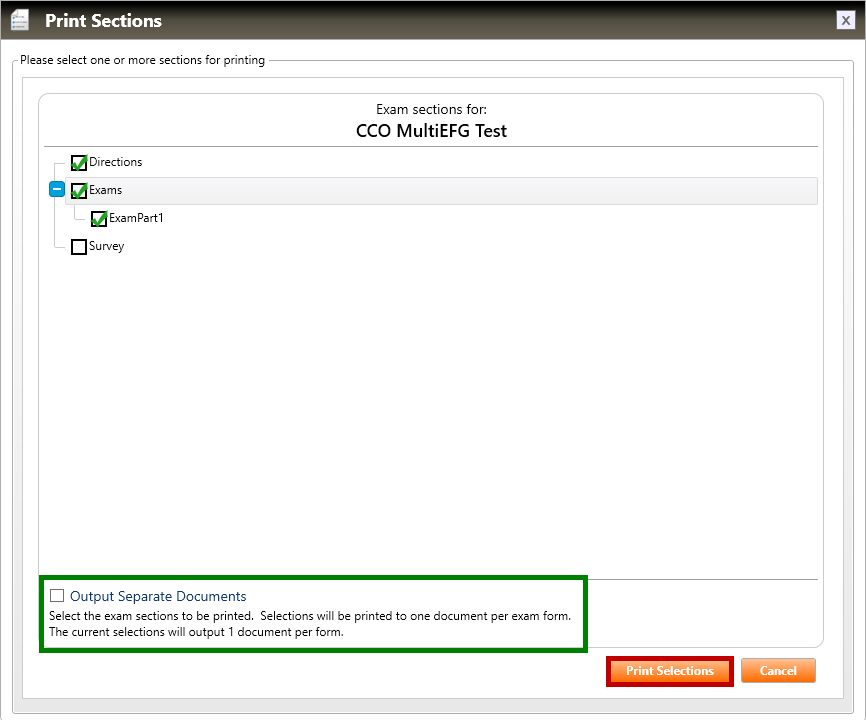
4) If the Output Separate Documents checkbox is unselected, then one Word document will be produced that contains all the selected sections for each form. In the example below, the CCO MulitEFG Test form group contains two forms. This will result in two documents being produced.
5) Selecting Print Selections (highlighted in red, above) will display the Browse For Folder dialog. Select a location to write the print output, then click the OK button.
6) The print request progress will display in the Activity Monitor. When complete, click the View Output button (highlighted in red, below).
7) The Print Results dialog is displayed. The dialog will show which forms were printed successfully, as well as any that may have errored. Click Close (highlighted in red, below) to dismiss the dialog.
8) The Print dialog will display the location of the successfully printed Word document(s). Click Open Folder Location (highlighted in red, below) to open the folder containing the print output.