You can import a CSV file that contains a list of item IDs and classification assignments. Upon import, the classifications are applied to items.
Import file format:
The import function allows you to assign Classification Sets to items via a comma delimited file (cvs format). You can prepare a file in this format using EXCEL and then choosing Save As -> CSV. The file must contain the headers shown below. If the file is prepared using EXCEL, row 1 would contain the headers.
Headers
ITEM_ID
LEVEL_1_CODE
LEVEL_2_CODE
LEVEL_3_CODE
LEVEL_4_CODE
LEVEL_5_CODE
Header
Field Description
ITEM_ID
Item Id for the classification assignment
LEVEL_1_CODE
Highest Classification Level (node) in the Classification Set hierarchy.
LEVEL_2_CODE
Second highest Classification Level (node) in the Classification Set hierarchy.
LEVEL_3_CODE
Third highest Classification Level (node) in the Classification Set hierarchy.
LEVEL_4_CODE
Fourth Classification Level (node) in the Classification Set hierarchy.
LEVEL_5_CODE
Lowest Classification Level (node) in the Classification Set hierarchy.
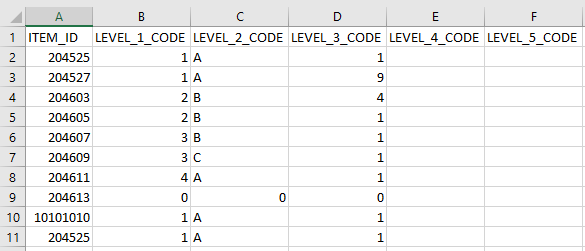
Below is an example of a CSV file created for Import as viewed in EXCEL.
Note: The CSV file must have all of the columns shown below. If your classification has, for example, only three levels of classification, the file must still contain columns for the LEVEL_4_CODE through LEVEL_5_CODE inclusive, in which case the cells in these columns would be blank.
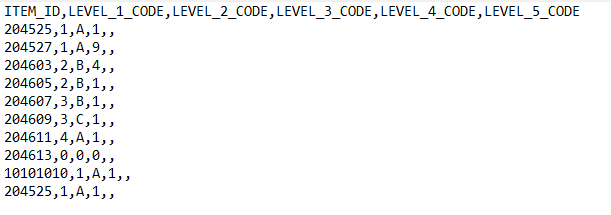
Below is an example of a CSV file created for Import as viewed in its true form.
To import item classification assignments:
1. In the Workflow menu, click Classification Management > Import Item Classification Assignments:
2. The Import MCQ Classifications dialog box will appear:
3. Choose the classification definition you wish to import into, from the Classification dropdown menu.
4. Click the Browse button to find (on your local or network drive) and select the CSV file that you wish to import.
5. Click the Import button to begin the import.
6. When the import is complete, click the View Output button that appears in the Activity Monitor:
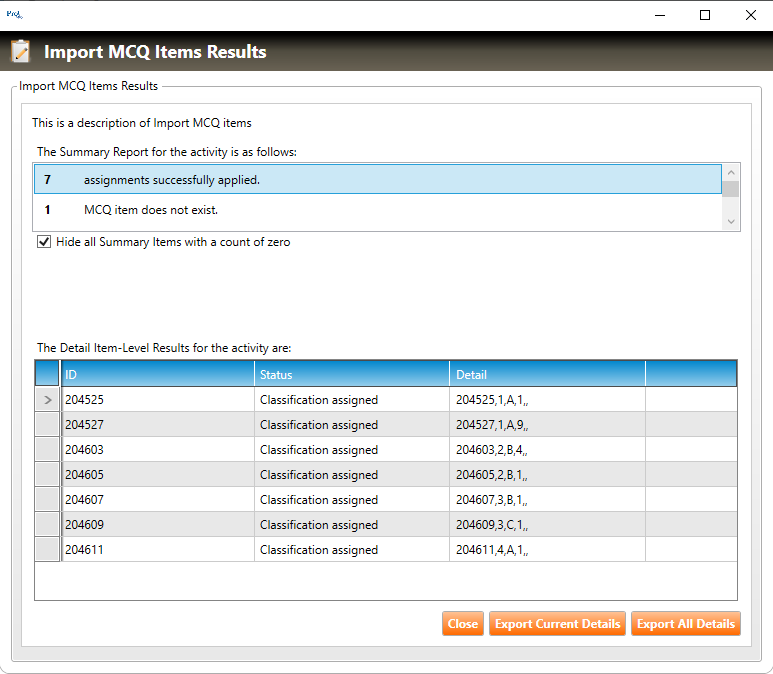
7. The Import MCQ Items Results screen will appear, showing you the results of the import: