Follow the steps below to customize the Pro! environment's layout:
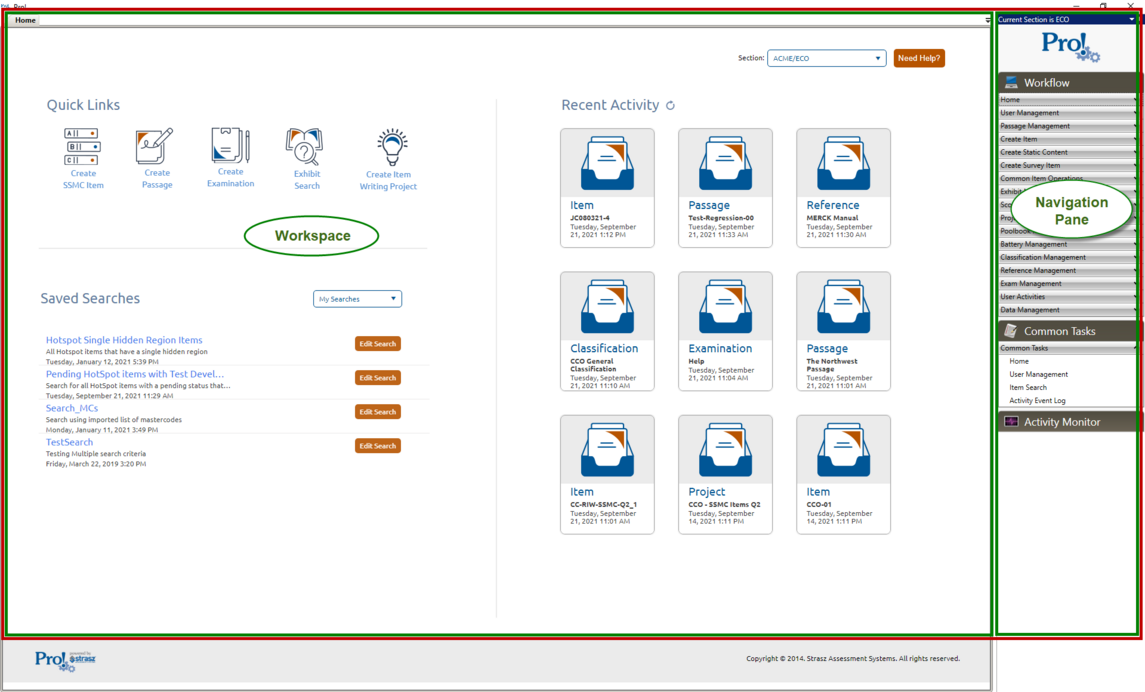
1. Default layout of the Pro! environment:
In the default layout of the Pro! environment (shown below), everything appears within one window (highlighted in red). The tabs appear across the top of the window in the Workspace, and the Navigation Pane appears along the right side of the window (highlighted in green).
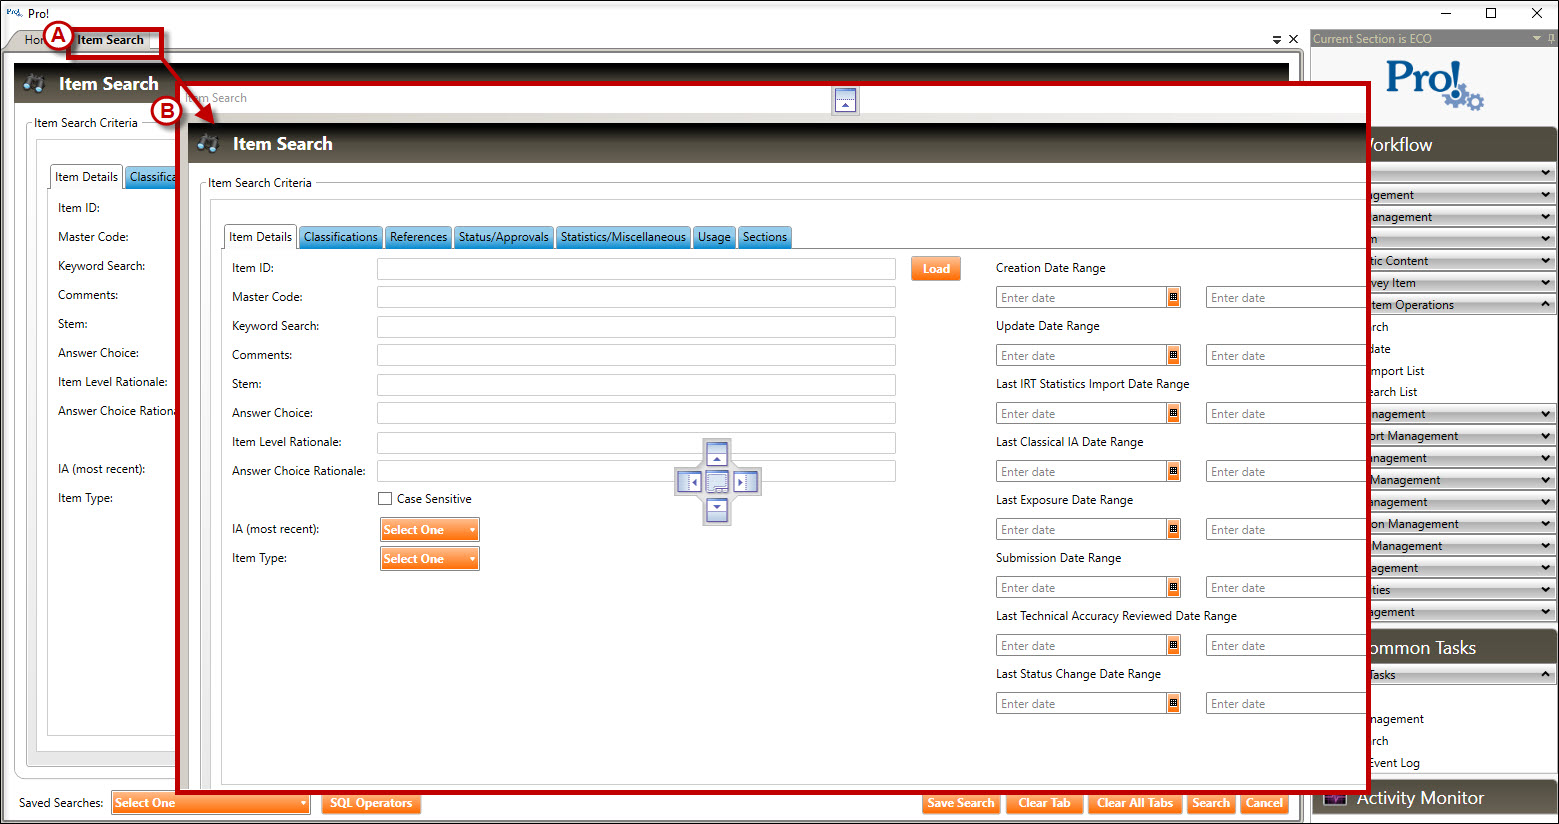
2. To move a tab or the navigation pane into a floating window:
Click and drag a tab (or the navigation pane) away from the other tabs in the workspace. In the example below, the user is dragging the Item Search tab:
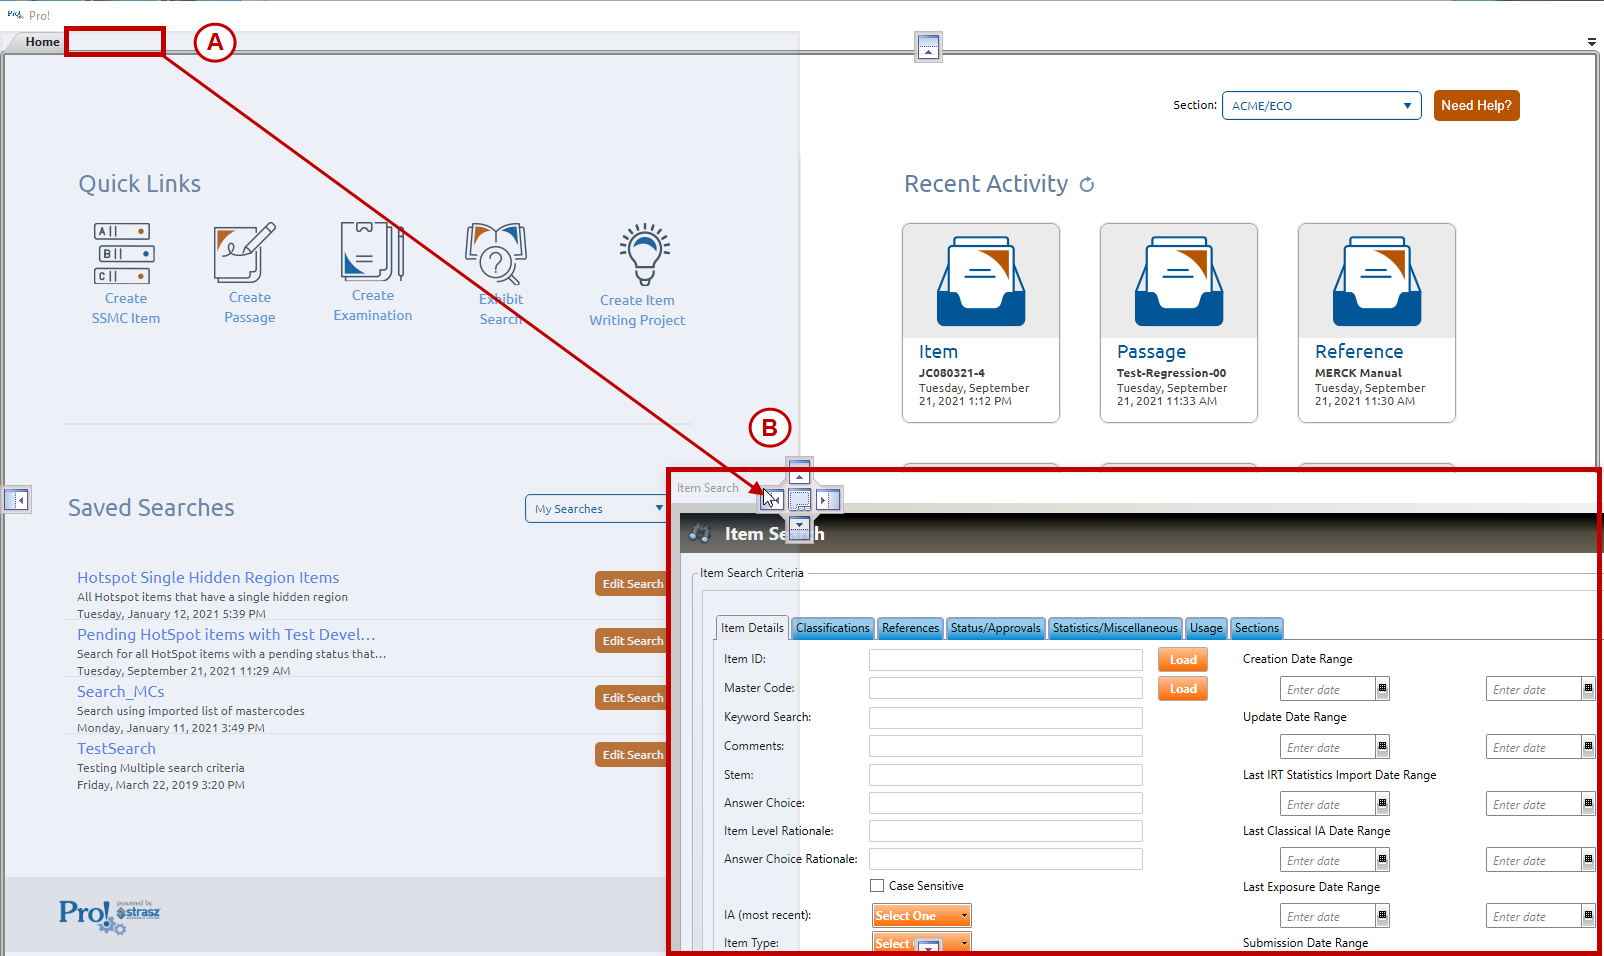
Drop the tab (or the navigation pane) and it will now float as its own window. In the example above, the tab has been converted to a floating window called Item Search.
3. To move a tab or the navigation pane to the side of the Pro! environment:
Click and drag a tab (or the navigation pane) away from the other tabs in the workspace. In the example below, the user is dragging the Item Search tab:
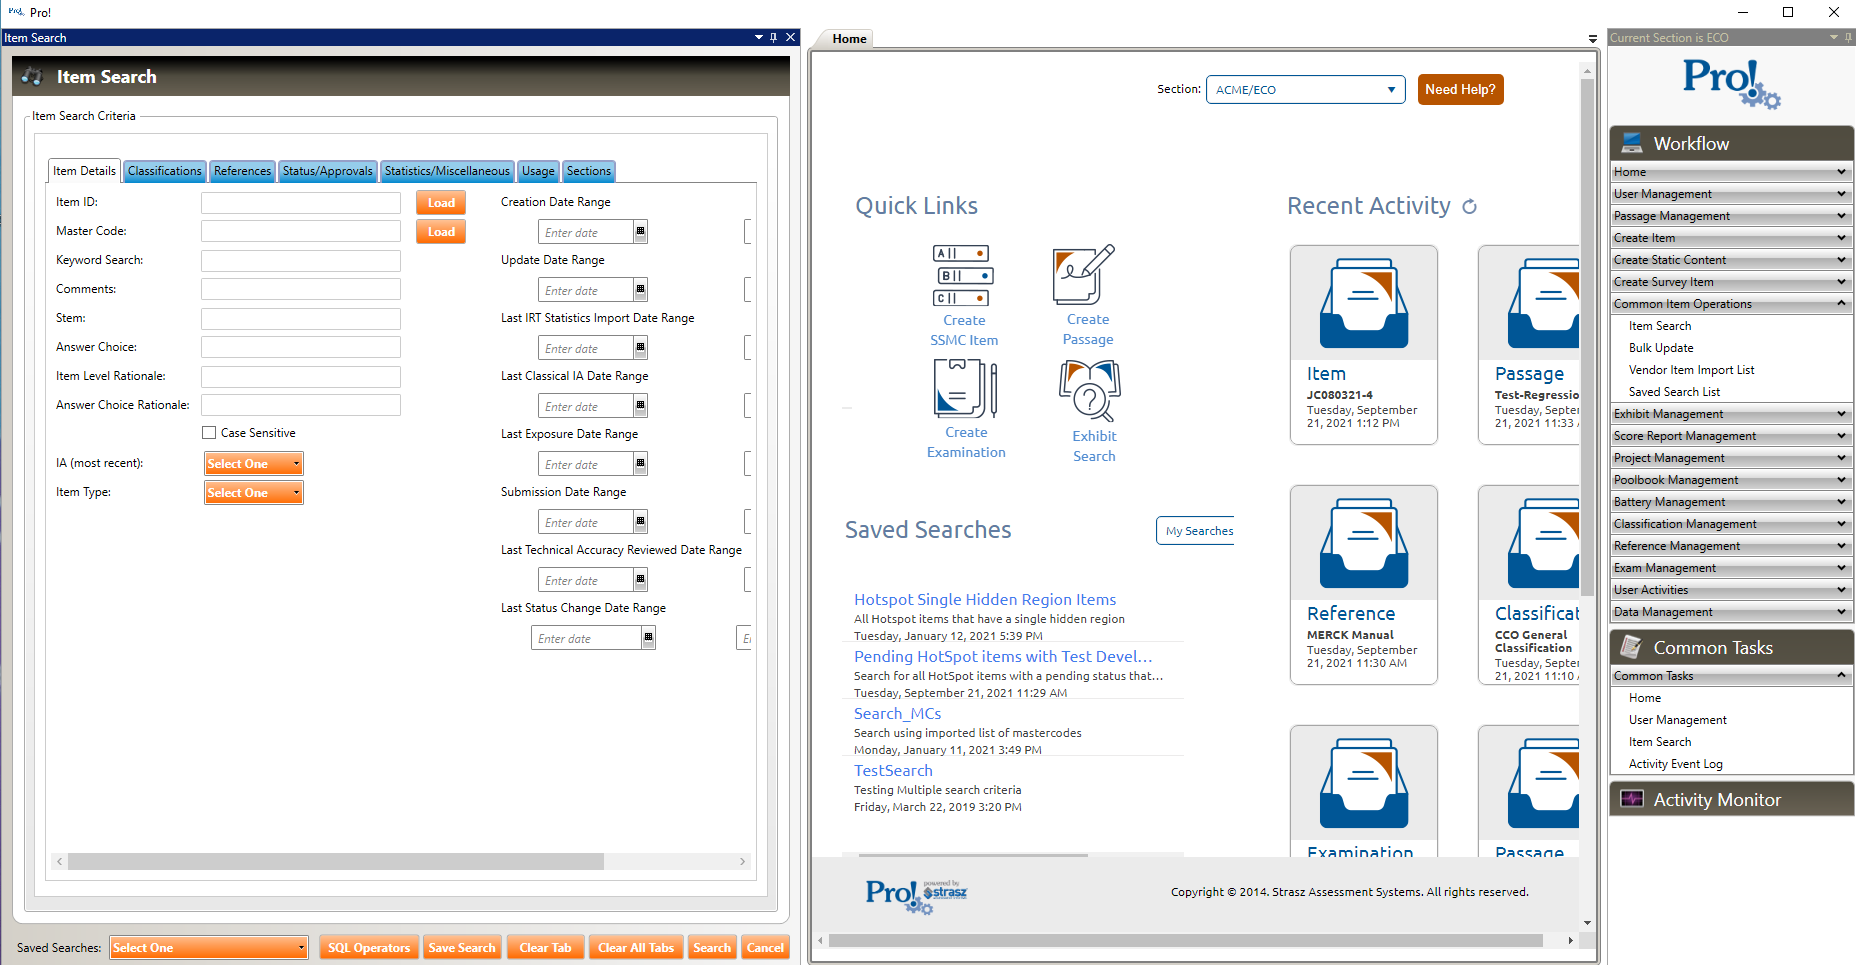
When the Multiple Document Interface dock appears, drop the tab (or the navigation pane) on the up, down, left or right arrow in order to dock it on the top, bottom, left or right side of the screen. In the example above, the tab has been dropped on the dock's left arrow in order to dock the tab on the left side of the screen: