Assigning item writers to a project, emailing them, and assigning mentors
Typically, the project/campaign manager assigns item writers to a project, assigns mentors to them, and then sends the writers an e-mail, informing them of the Pro! download/installation URL. Alternatively, they can direct item writers to a web site that contains the URL plus other important information.
Note:Click here for instructions on downloading and installing Pro! (for external item writers).
To assign item writers to a project, email them, and assigning mentors:
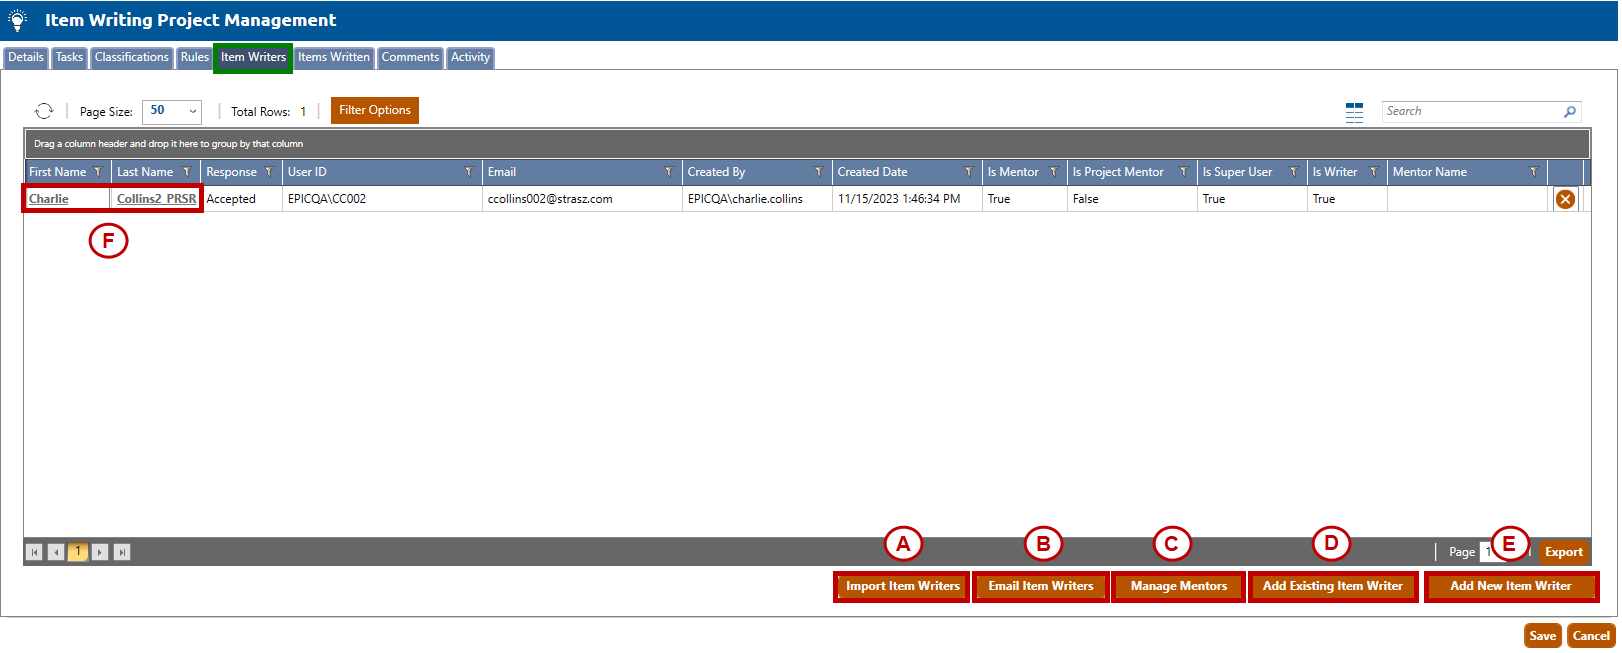
1. Navigate to the Item Writers tab of the Item Writing Project Management screen (highlighted in green below). Follow Steps A, through F, below to add item writers, assign them mentors, email item writers, and optionally assign a project mentor to the project.
A. To import a list of item writers into the project (from a .csv file)
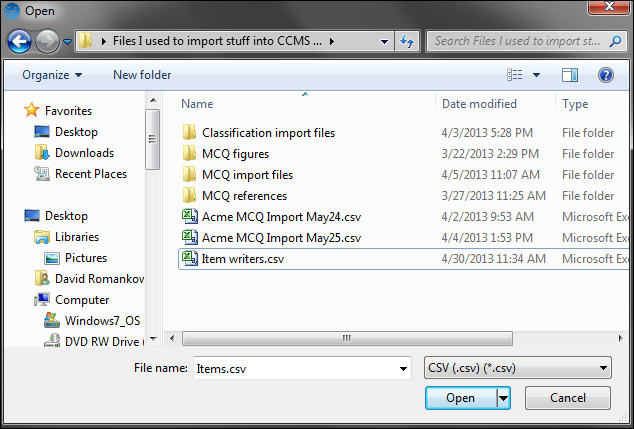
To import a list of item writers into the project (from a .csv file), click the Import Item Writers button. The Open popup window will appear (shown below).
Browse your local or network drives to locate and select the desired .csv file containing the list of item writers.
Click the Open button to import the item writers.
B. To email item writers
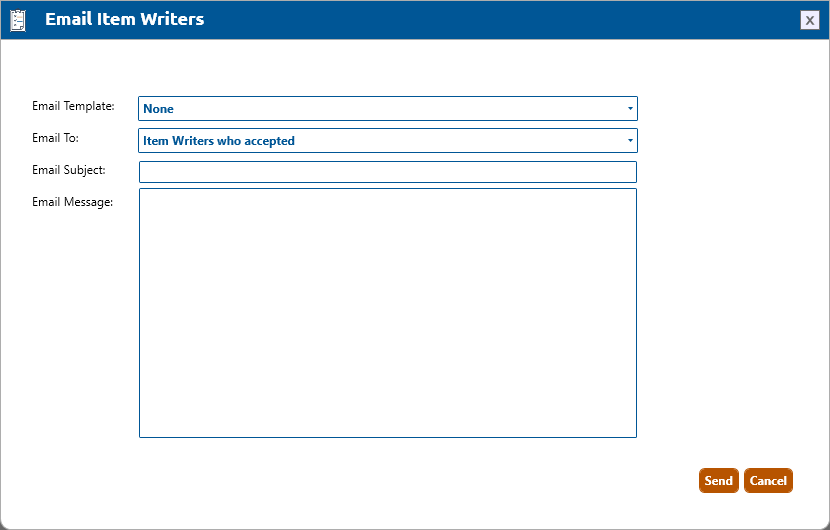
Click the Email Item Writers button. The Email Item Writers popup window will appear (shown below).
Select the recipient(s) for the email from the Email To dropdown list (All Item Writers in Project, Item Writers who accepted, etc.). If you choose Specific Item Writers, then you will be prompted to choose which item writers to send the email to.
Write a subject for the email in the Email Subject field.
Compose your message in the Email Message field.
Click the Send button to send the email.
C. To assign and manage mentors
When you create an item writer, you may designate that writer as a mentor (meaning that they will mentor other item writers). When creating a project, you may assign item writers to mentors.
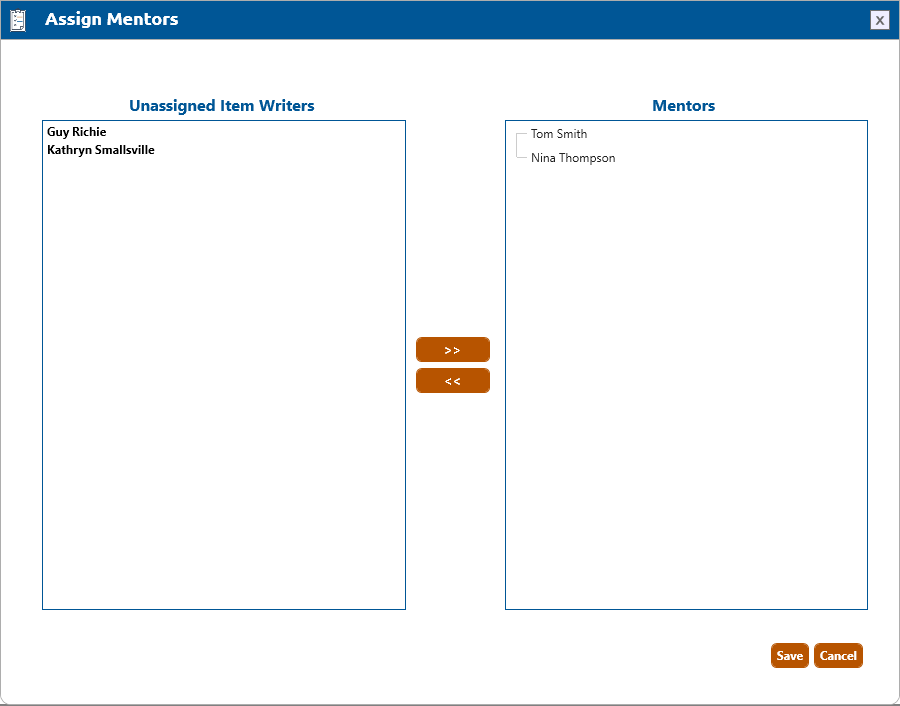
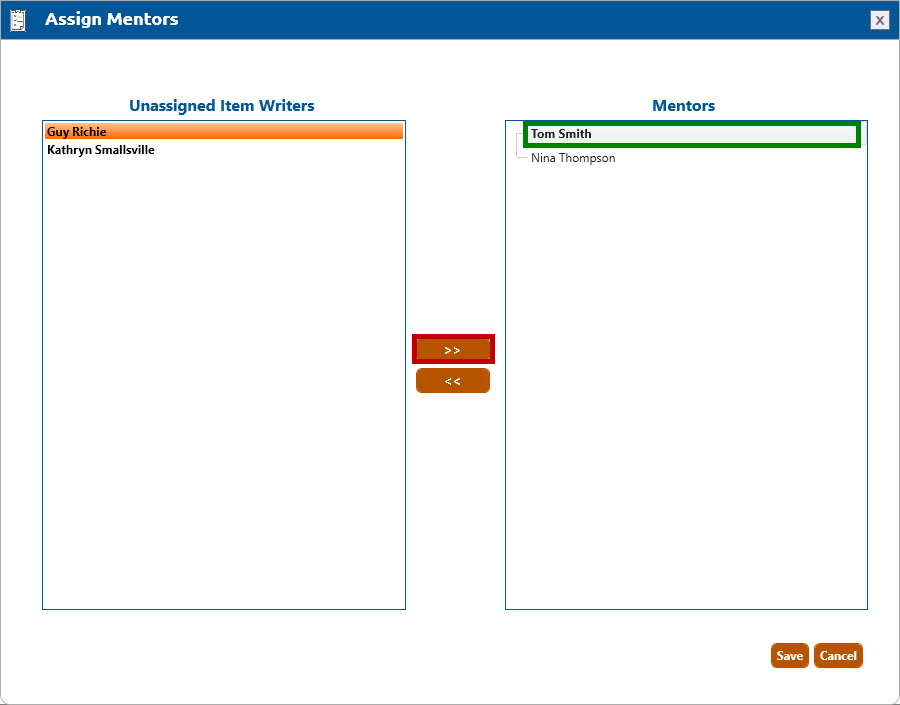
Click the Manage Mentors button. The Assign Mentors popup window will appear (shown below). The left side of the window shows the project's unassigned item writers, and the right side shows the project's available mentors.
To assign an item writer to a mentor, first click the desired mentor (highlighted in green, below). Then click the desired item writer (highlighted in orange, below). Then click the >> button (highlighted in red, below).
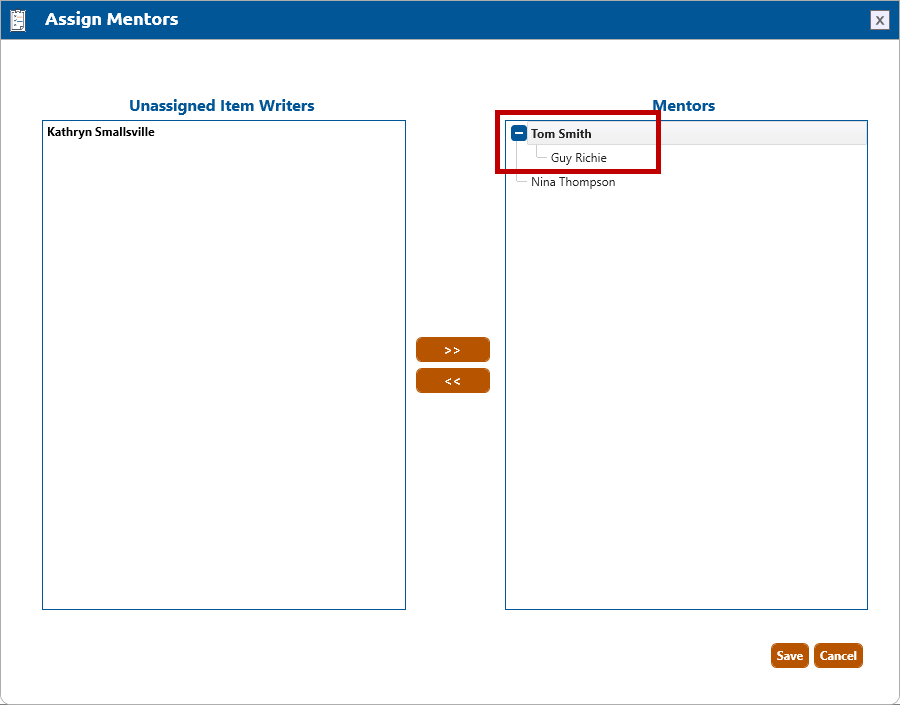
The selected item writer will appear underneath the selected mentor (highlighted in red, below).
Click the Save button to save all changes.
D. To add an existing item writer to the project
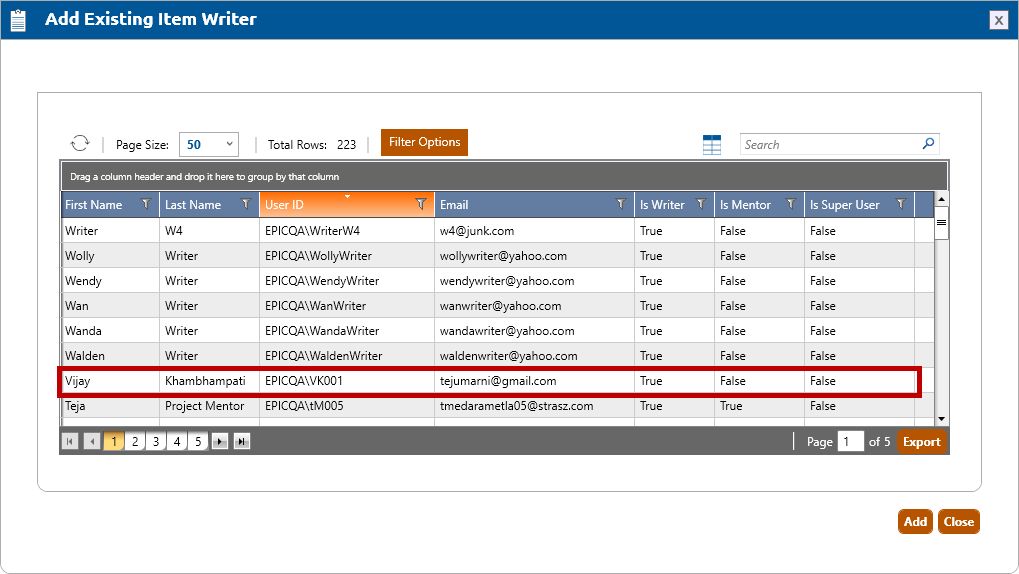
To add an existing item writer to the project, click the Add Existing Item Writer button. The Add Existing Item Writer popup window will appear (shown below).
Select the desired item writer (highlighted in red, below).
Click the OK button.
E. To add a new item writer to the project
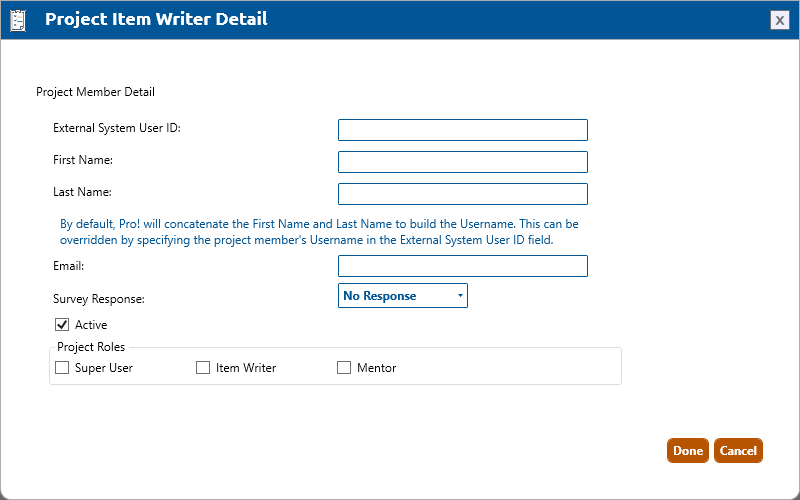
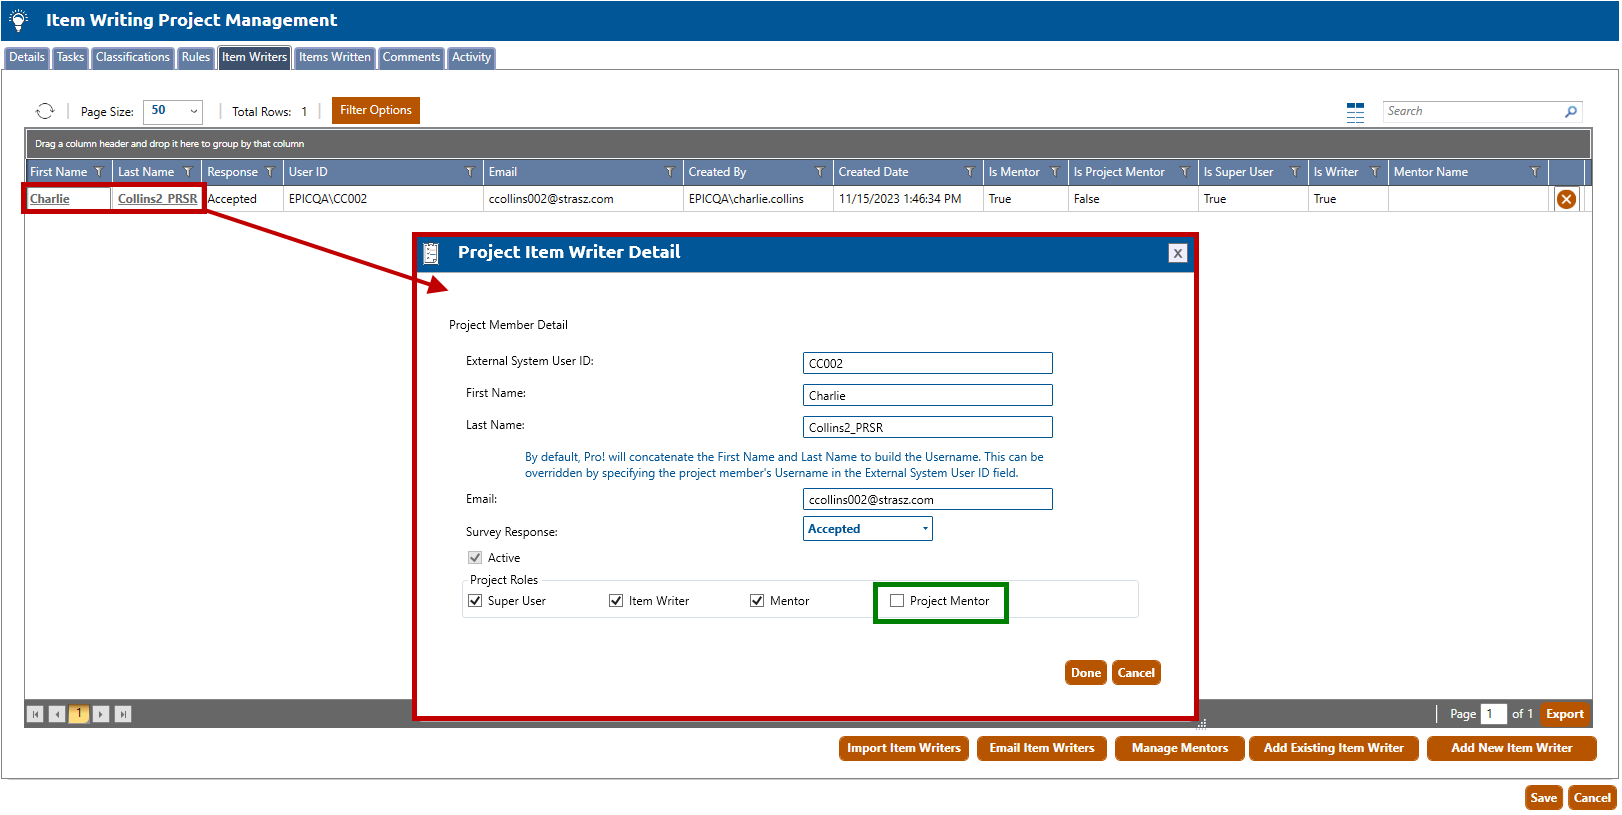
To add a new item writer to the project, click the Add New Item Writer button. The Project Item Writer Detail popup window will appear (shown below).
An Item Writing Project may optionally have a Project Mentor assigned. To designate a mentor assigned to the project as a Project Mentor, click on their name in the Item Writers tab to open the Project Item Writer Detail popup for that writer (highlighted in red, below):
Select the checkbox for Project Mentor (highlighted in green, above).
Click the Done button.
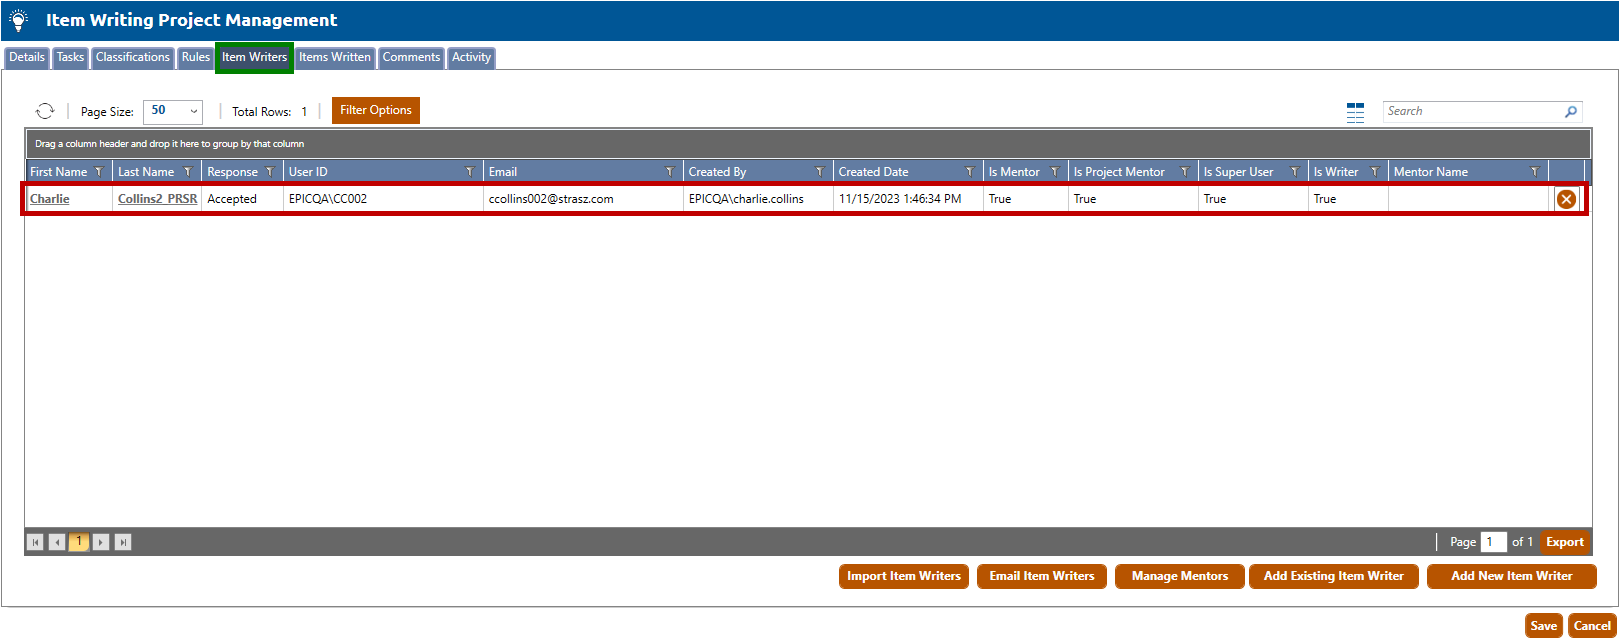
2. After completing the steps above, the added item writer(s) will appear (highlighted in red, below) in the Item Writers tab (highlighted in green, below):