Creating an Item HTML Report
To create an Item HTML report:
2. Follow Steps A through C, below:
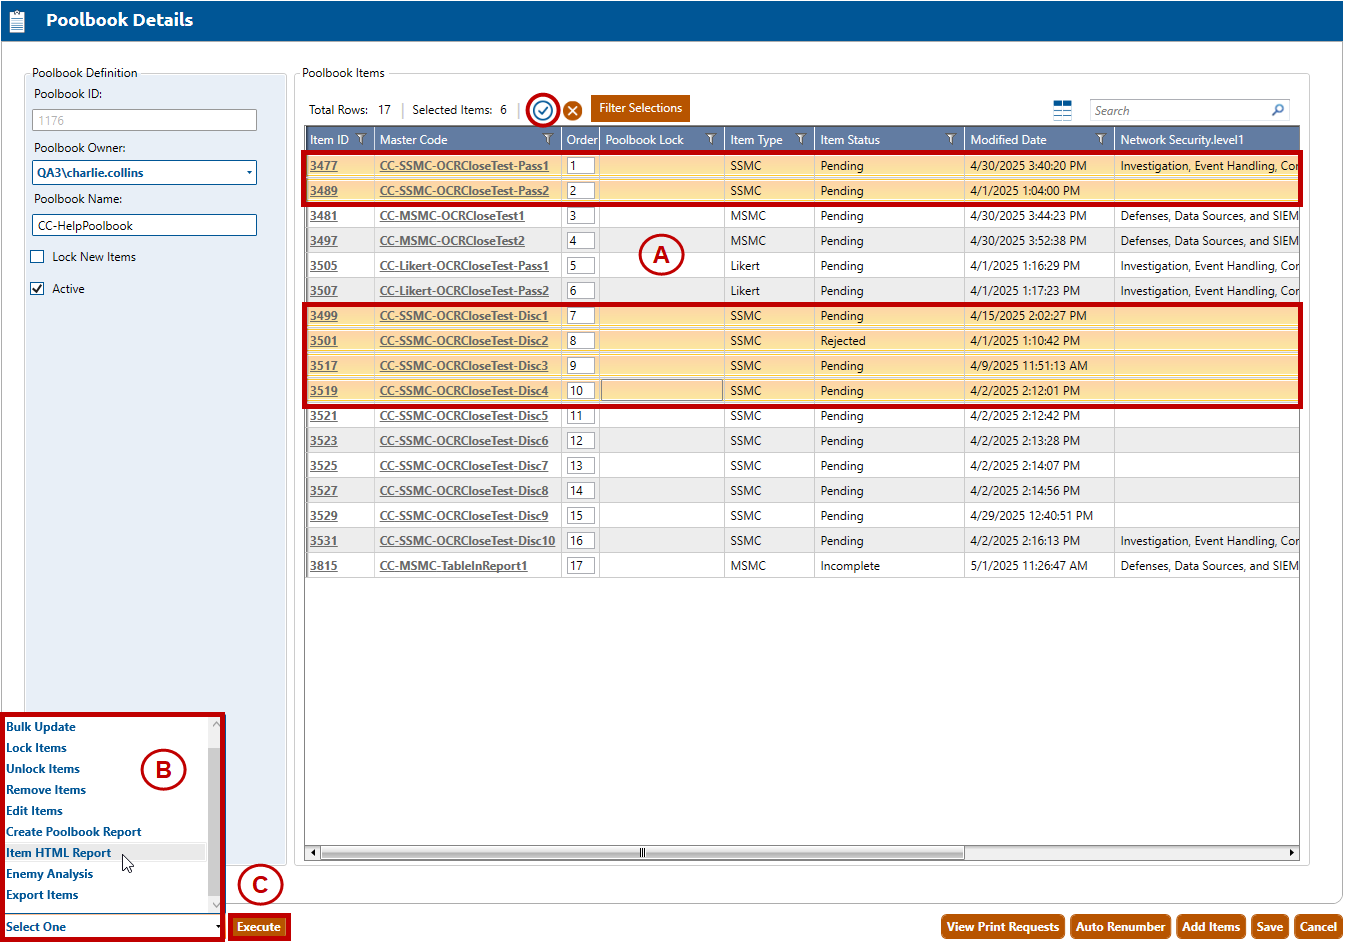
A. Select the poolbook items that you wish to include in the poolbook report. To select all poolbook items, click the checkmark button (circled, above). In the example above, the user has selected six poolbook items. If the user does not select any items, the system will select all items in the poolbook view by default.
B. Select Item HTML Report from the Select One dropdown list.
C. Click the Execute button. The Create Poolbook Item Html Report window will appear:
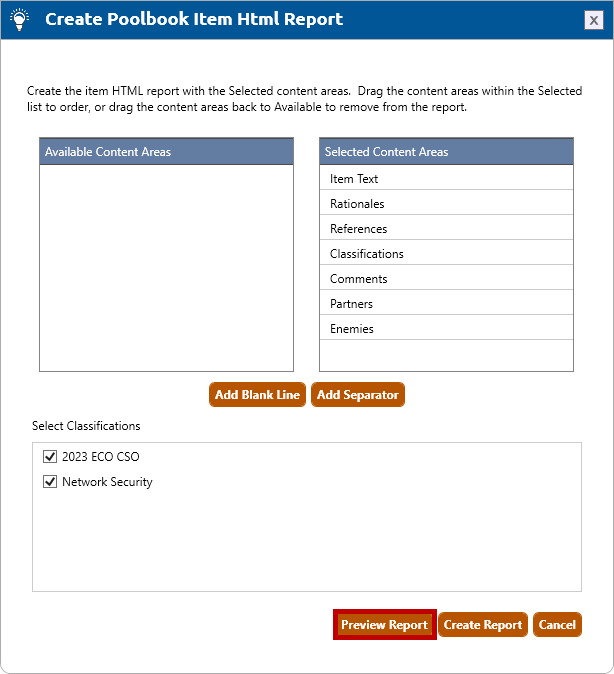
3. By default the Selected Content Areas contains all available areas. If some are not required in the output, drag and drop the row into the Available Content Areas box.
4. The content areas will display in the report according to their order in the Selected Content Areas list. To reorder the list, drag and drop the rows into their desired position within the list.
5. To add a blank line to the Selected Content Areas list, click the Add Blank Line button. The blank line will be added to the end of the list. It can be drag and dropped into the desired position in the list.
6. To add a separator line to the Selected Content Areas list, click the Add Separator button. The separator line will be added to the end of the list. It can be drag and dropped into the desired position in the list.
7. To remove a blank line or separator, drag and drop the row into the Available Content Areas box.
8. A list of all classifications associated to the selected items is listed under Select Classifications with all classifications being selected by default. Uncheck any classifications that are not wanted in the report output.
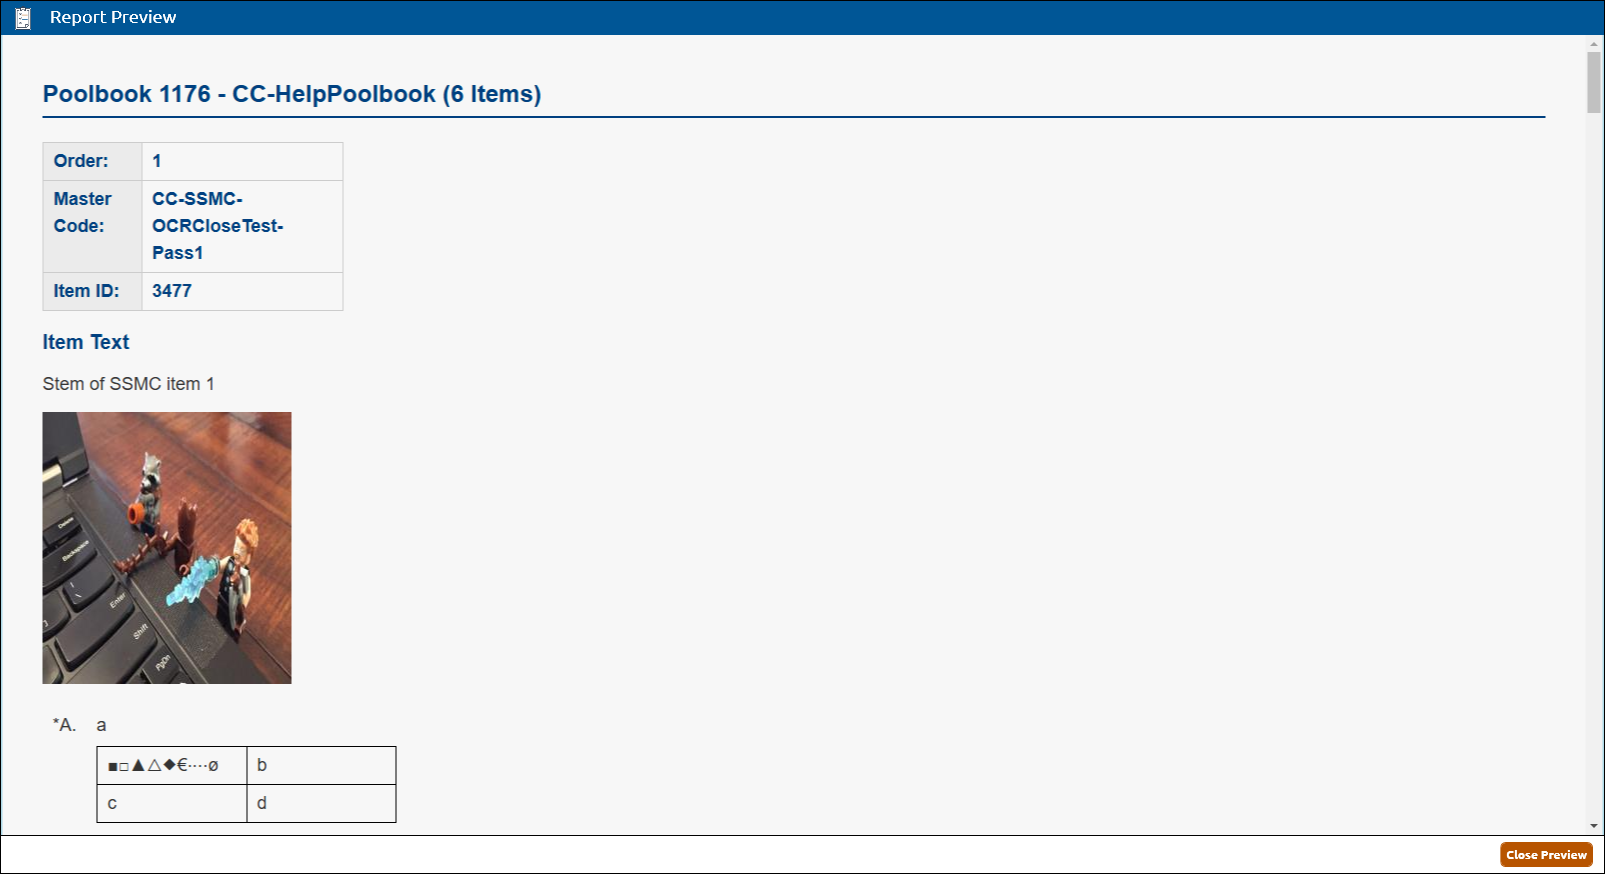
9. Click the Preview Report button (highlighted in red, above) to preview the report output prior to the report generation.
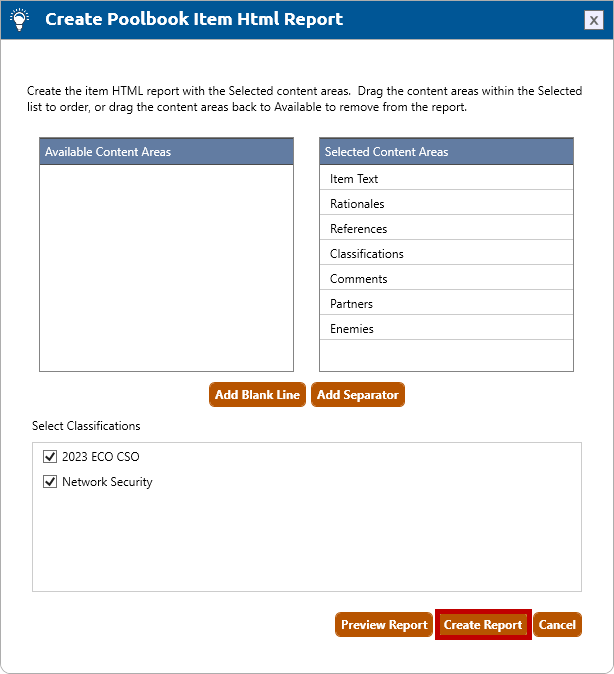
10. Click the Create Report button (highlighted in red, below) to generate the Item HTML report.
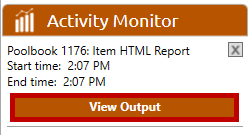
11. Click the View Output button (highlighted in red, below) in the Activity Monitor:
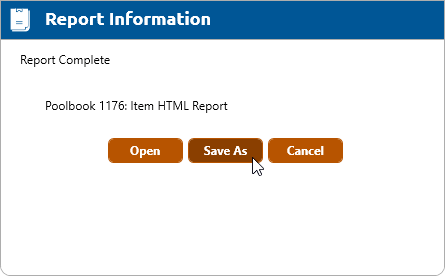
12. The Report Information window will appear (shown below). If you want to immediately open the zipped file folder to your screen, click the Open button. The folder will be opened in the local Temp directory. Clicking the Save As button and following the prompts allows the save location to be defined for the report output folder.