Editing the details of an exhibit
|
|
Notes:
1. If an exhibit is used in an item and that item is locked, then the exhibit may not be edited. In this case, the exhibit will display the message 'Exhibit content is locked' in the Details tab.
2. Click here for full instructions on creating the details of an exhibit.
|
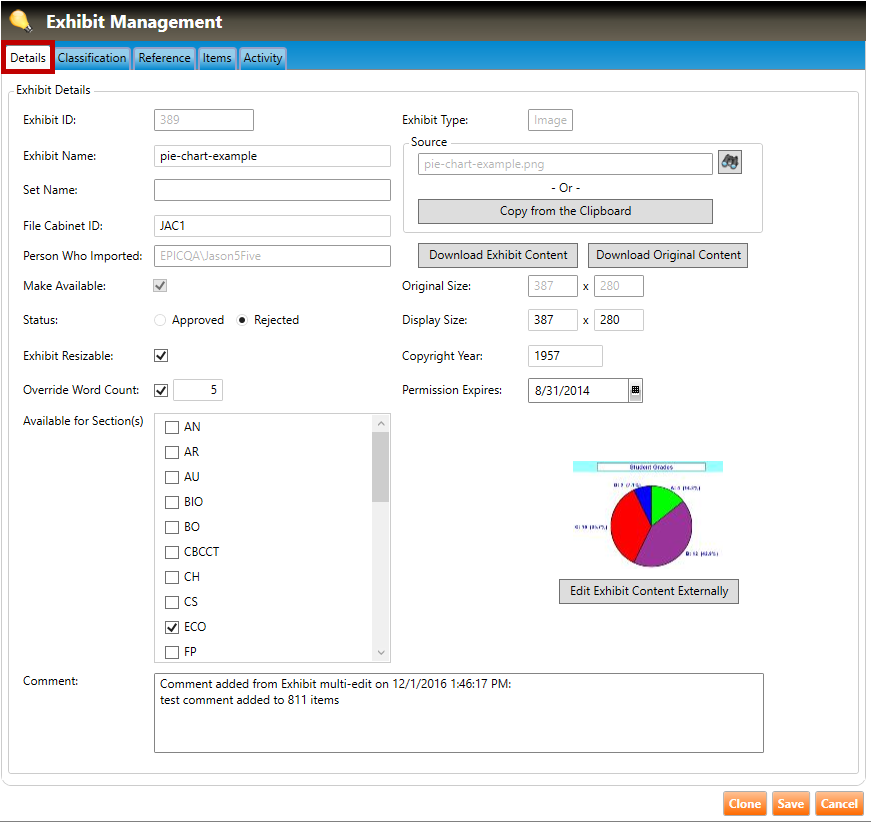
To edit the details of an exhibit:
2. Navigate to the Details tab (highlighted in red, below).
3. Edit the Exhibit Name (this is a required field).
4. Edit the File Cabinet ID. This can be any combination of letters, numbers, and symbols that helps your department or company identify the exhibit.
5. Edit the Copyright Year.
6. Edit the Permission Expires field, which is the last date of permitted use for the exhibit.
7. Select the Make Available checkbox if you want the exhibit to be available when authoring items.
8. Select one or more sections from Available for Section(s) for which the exhibit may be used in an item. You are required to approve at least one section for an exhibit.
9. Select Override Word Count checkbox if a word count other than the section default is to be used for this exhibit. Selecting the box will allow for the input of a customized word count value that will be assigned to this exhibit when used in an item or passage.
10. Enter any comments or notes in the Comment field.
11. Import an image into the exhibit
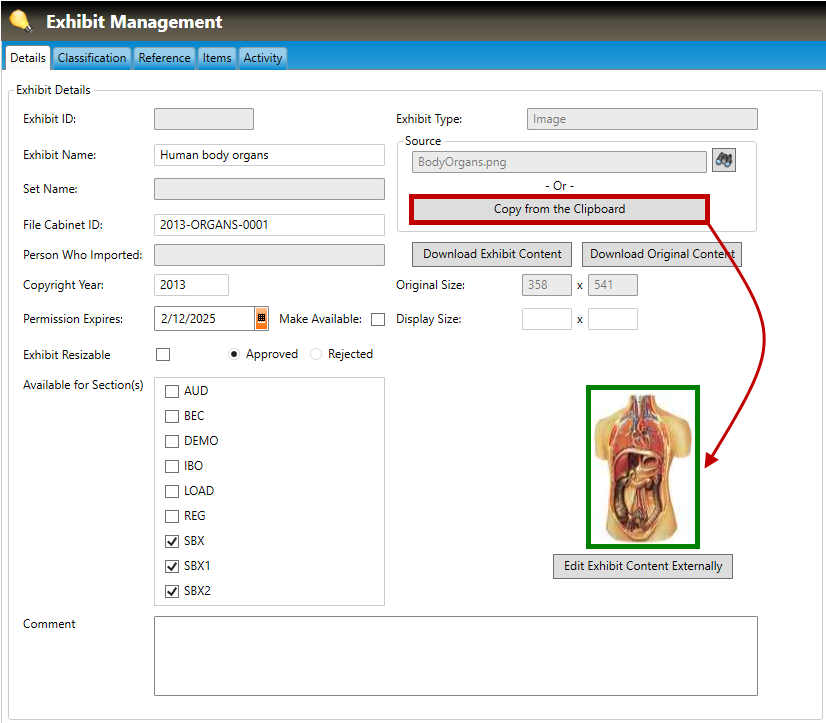
A. When importing an image into Pro!, you have the option of i) Copying an image from your computer's clipboard (memory), or ii) Downloading an image from a local or network drive:
i. To copy an image that already has been copied to your computer's clipboard (memory), click the Copy from the Clipboard button (highlighted in red, below). The image in memory will be copied to the Pro! system, and a small preview of it will appear in the Exhibit Management window (highlighted in green, below). In the example below, the user has copied an image of human organs.
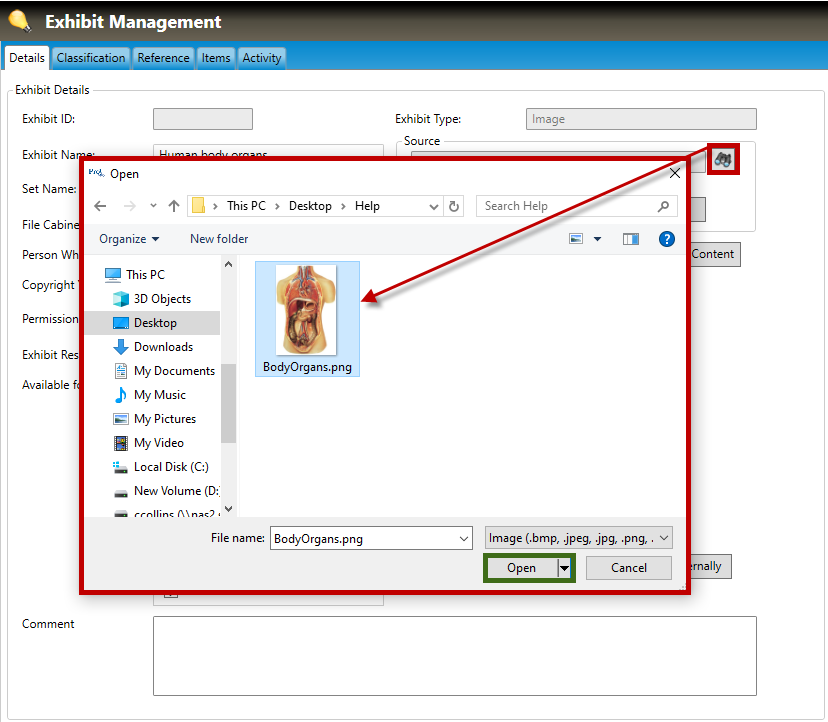
ii. To download an image from a local or network drive, click the binoculars button (highlighted in red, below) and then browse for the image file (.bmp, .jpeg, .jpg, or .png) you wish to download. Select the image, then click the Open button (highlighted in green, below).
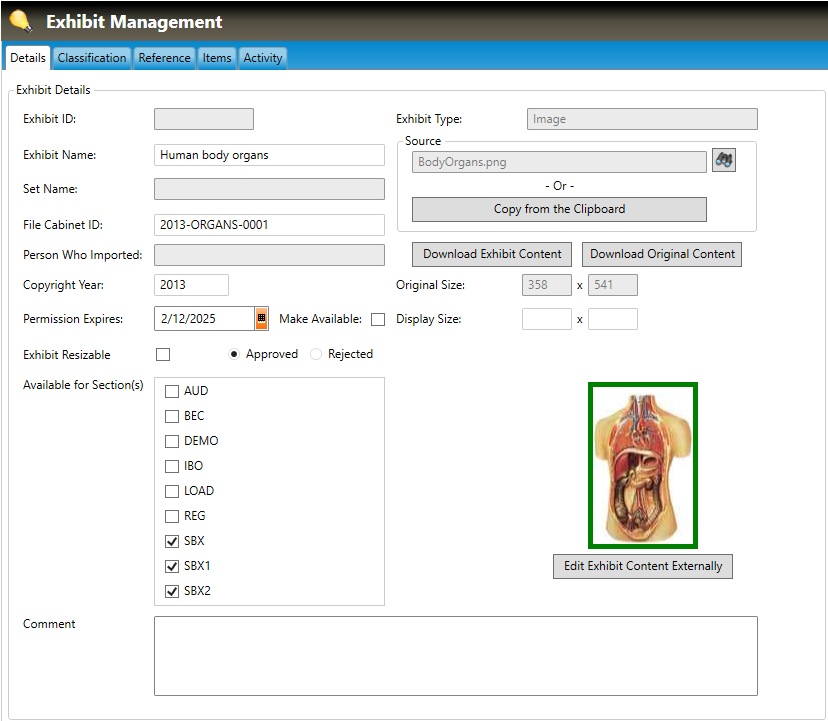
The image will be downloaded to the Pro! system, and a small preview of it will appear in the Exhibit Management window (highlighted in green, below). The name of the source file will appear in the Source field. In the example below, the user has downloaded a picture of human organs.
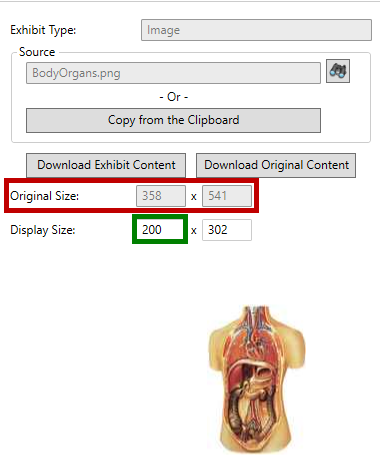
B. Note that any copied or downloaded image is imported at the same physical dimensions as the source image. In the example below, the human body image has been imported at dimensions of 358 pixels (width) x 541 pixels (height) (highlighted in red, below). To change the dimensions at which the image will display when used in an item, enter a new width for the image in the Display Size width field (highlighted in green, below), then press <TAB>. The Display Size height will be automatically calculated (constrained to the original image's proportions) and entered.
In the example below, the user entered a Display Size width of 200; after the user pressed <TAB>, Pro! entered a height of 302.
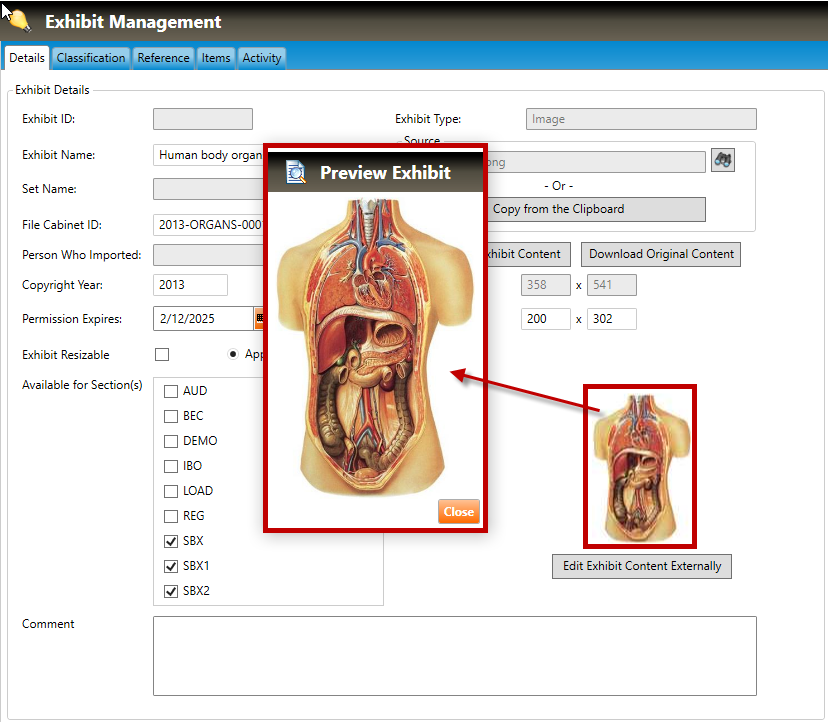
C. To preview the image at its Display Size (i.e., the size at which the image will display when used in an item), click the small preview image to open a full-sized Preview Exhibit window (shown below). Click the Close button to close the full-sized preview window.
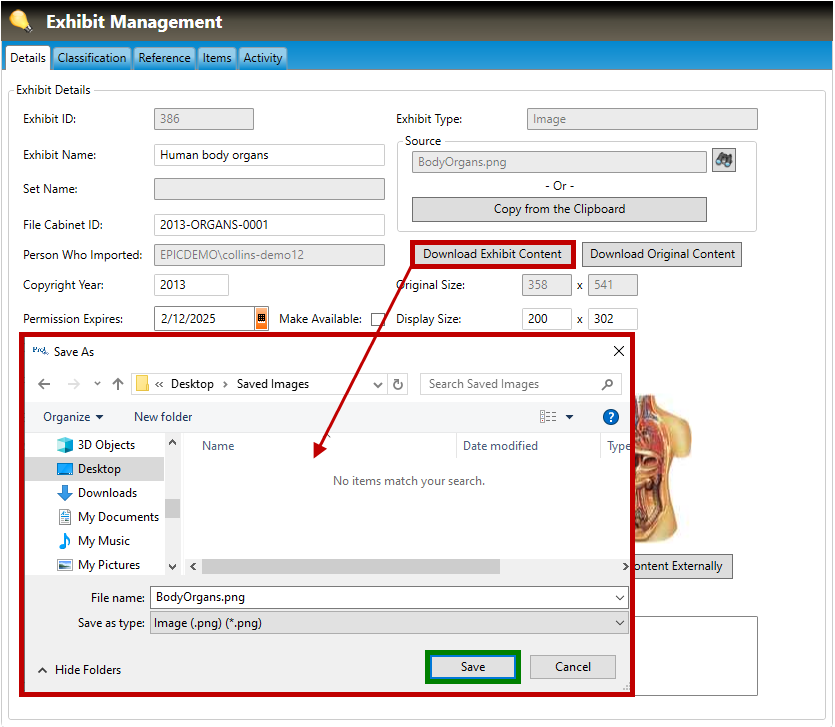
D. At any time, you may wish to download the exhibit's image from Pro! to your local or network drive. To do this, click the Download Exhibit Content button (highlighted in red, below). This will open a Save As dialog box. Browse to the desired local or network drive, then click the Save button (highlighted in green, below) to save the file.
12. Import an audio/video clip into the exhibit
A. When importing an audio/video clip into Pro!, you have the option of i) Copying an image from your computer's clipboard (memory), or ii) Downloading an image from a local or network drive:
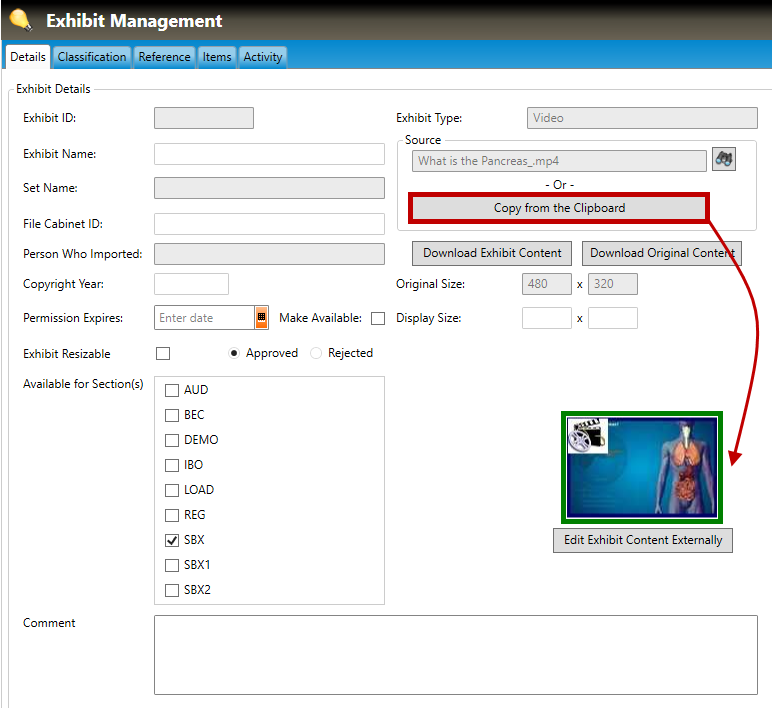
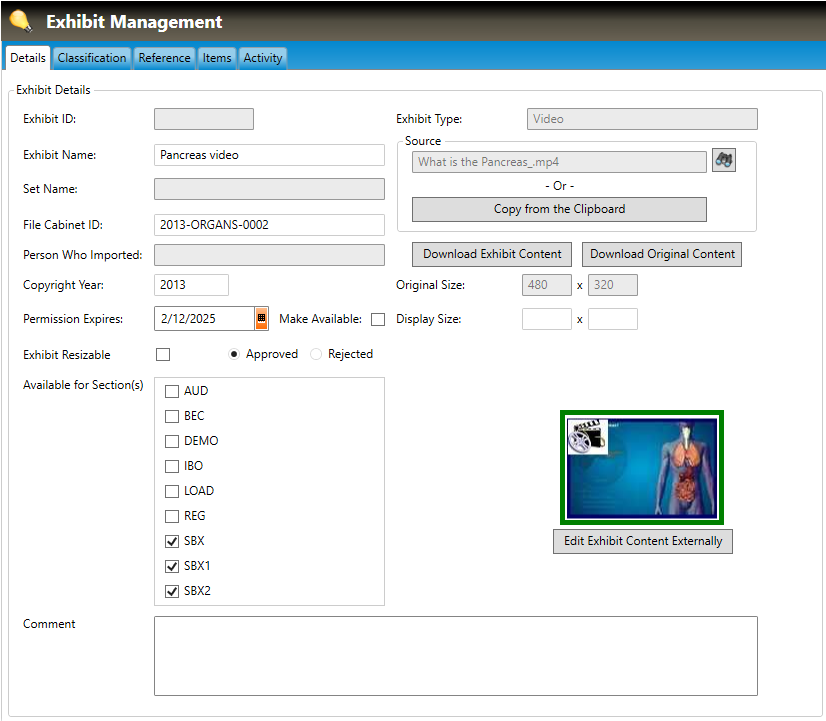
i. To copy an audio/video clip that already has been copied to your computer's clipboard (memory), click the Copy from the Clipboard button (highlighted in red, below). The image in memory will be copied to the Pro! system, and a small preview of it will appear in the Exhibit Management window (highlighted in green, below). In the example below, the user has copied a video of the human pancreas.
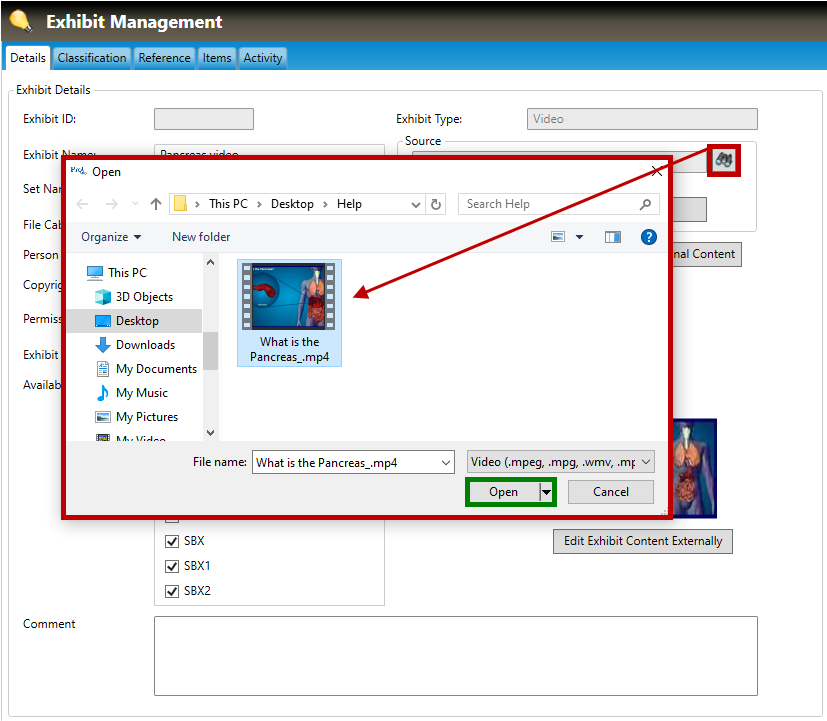
ii. To download an image from a local or network drive, click the binoculars button (highlighted in red, below) and then browse for the file (.mpeg, .mpg, .wmv, .mp4, or .avi) you wish to download. Select the image, then click the Open button (highlighted in green, below).
The audio/video clip will be downloaded to the Pro! system, and a small preview of it will appear in the Exhibit Management window (highlighted in green, below). In the example below, the user has downloaded a video clip of human pancreas.
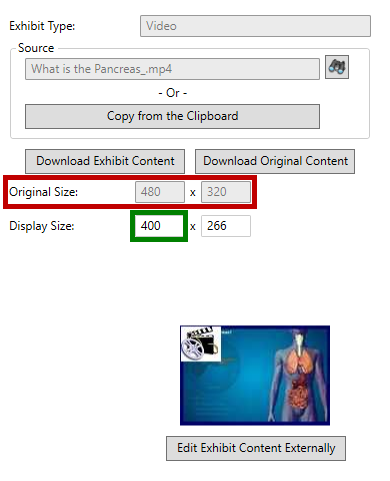
B. Note that any copied or downloaded audio/video clip is imported at the same physical dimensions as the source clip. In the example below, the pancreas video has been imported at dimensions of 480 pixels (width) x 320 pixels (height) (highlighted in red, below). To change the dimensions at which the video will display when used in an item, enter a new width for the video in the Display Size width field (highlighted in green, below), then press <TAB>. The Display Size height will be automatically calculated (constrained to the original image's proportions) and entered.
In the example below, the user entered a Display Size width of 400; after the user pressed <TAB>, Pro! entered a height of 266.
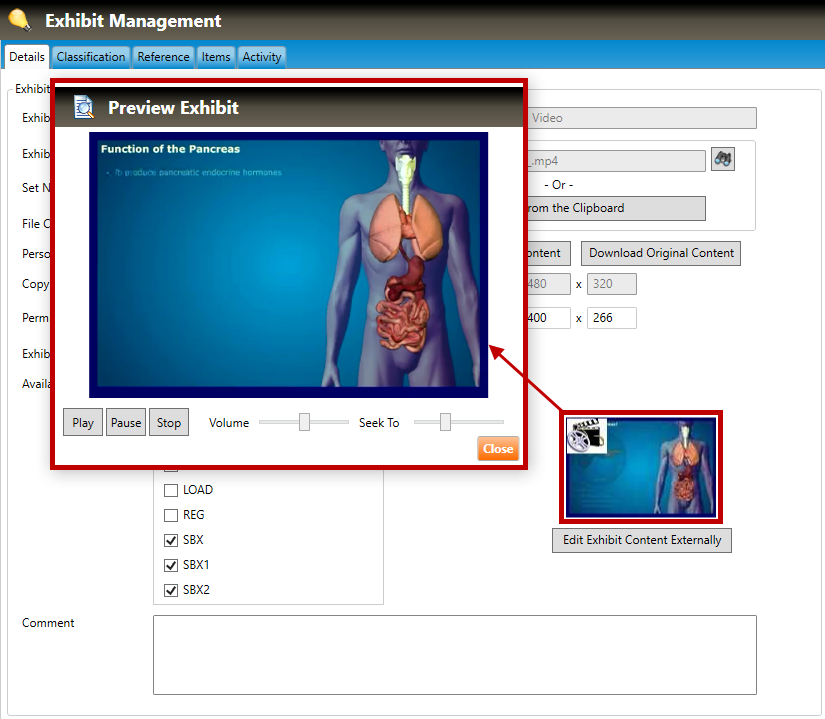
C. To preview the audio/video clip at its Display Size (i.e., the size at which the video will display when used in an item), click the small preview image to open a full-sized Preview Exhibit window (shown below). You may Play, Pause, and Stop the video, change the Volume, or skip ahead by sliding the Seek To slider. Click the Close button to close preview window.
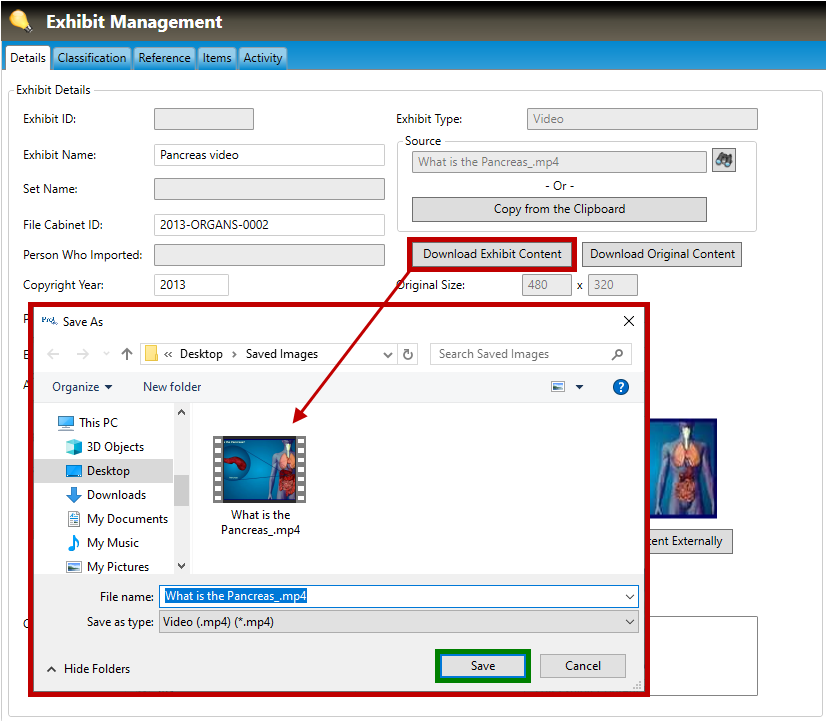
D. At any time, you may wish to download the exhibit's video from Pro! to your local or network drive. To do this, click the Download Exhibit Content button (highlighted in red, below). This will open a Save As dialog box. Browse to the desired local or network drive, then click the Save button (highlighted in green, below) to save the file.
13. Click the Save button to save all changes.