Creating a classification definition
To create a new classification definition:
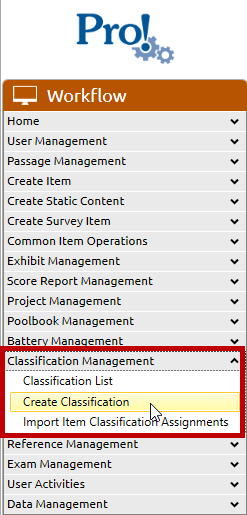
1. In the Workflow menu, click Classification Management > Create Classification:
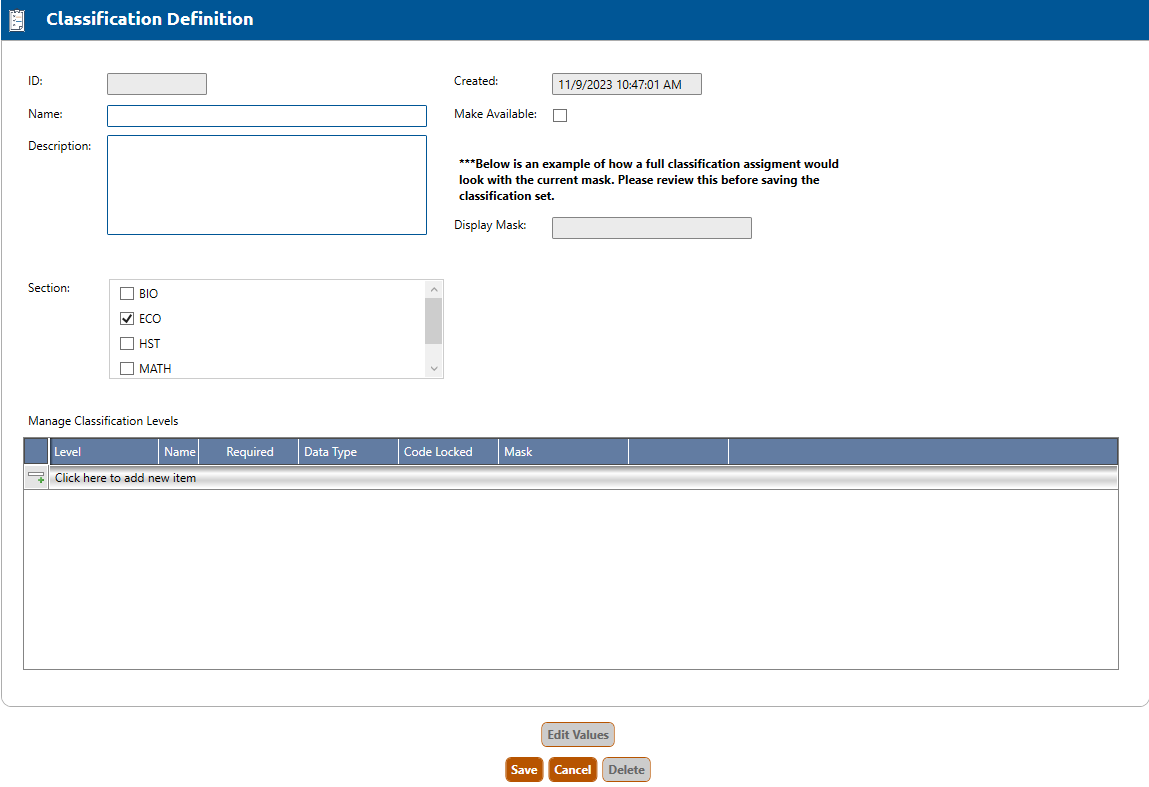
2. The Classification Definition screen will appear:
3. Enter a Name and Description for the new classification definition.
4. Check the Make Available checkbox if you want to make this definition available to users in the system.
5. Select the Section(s) from the list of authorized sections for the new classification definition.
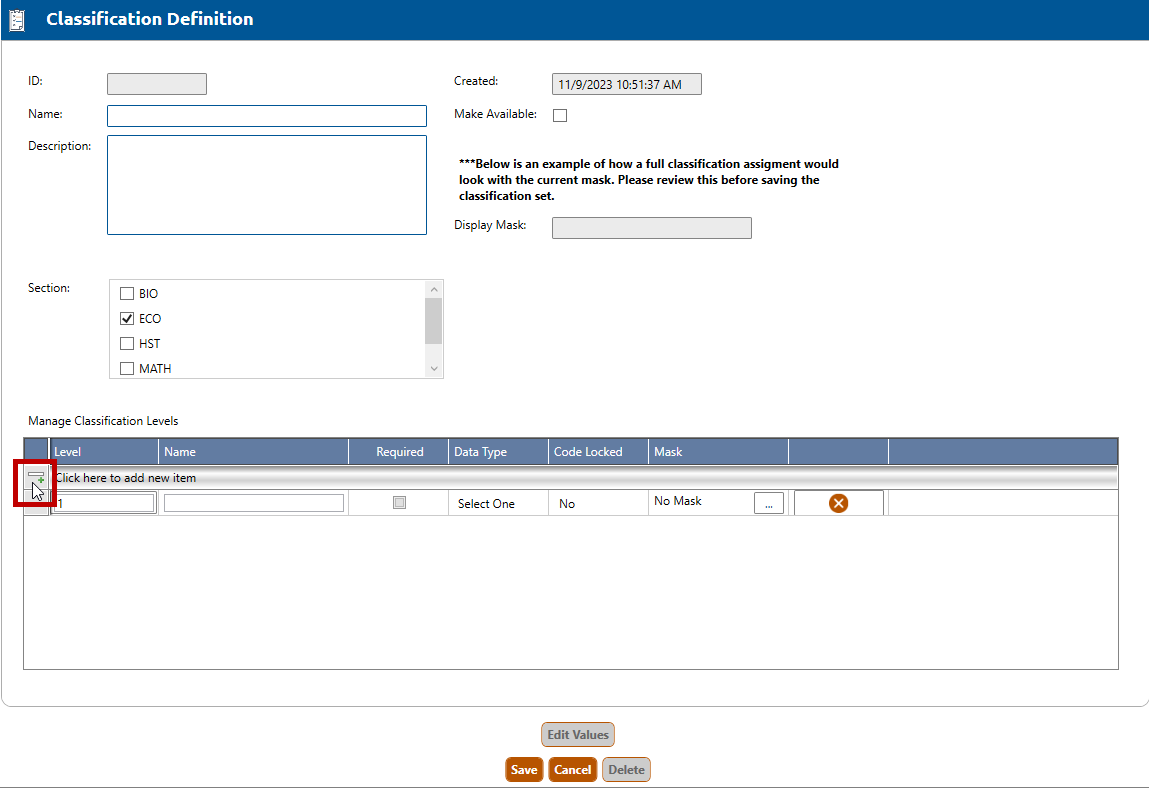
6. Select the Add icon (highlighted in red, below) in Manage Classifications Levels to add up to five classification levels for the new classification definition.
7. Provide a Name for each level and indicate if that level is required when assigning a value but checking the Required checkbox.
8. Select a Data Type for each level from the dropdown list (highlighted in red, below).
8. Select a Data Type for the level from the dropdown list (highlighted in red, below).
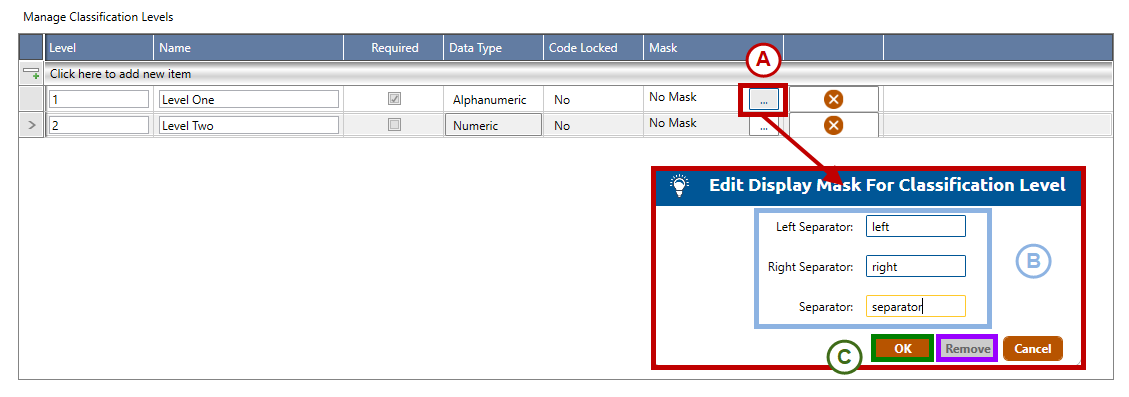
9. To add or edit a Display Mask, follow Steps A through C, below:
A. Click the Mask button for the display mask you wish to change. The Edit Display Mask For Classification Level dialogue box will appear.
B. Input the desired values for each Separator.
C. Click the OK button.
10. If you want to delete a display mask, repeat Step A and click the Remove button (highlighted in purple, above).
11. The Display Mask field (highlighted in red, below) will show an example of what the full classification assignment would look like.
12. Click the X icon to delete a level from the classification definition.
13. Click the Save button to save the new classification definition.